

We are a brand new blog, and we are working hard to bring you new, high quality posts. More to come soon. Thanks for your patience!

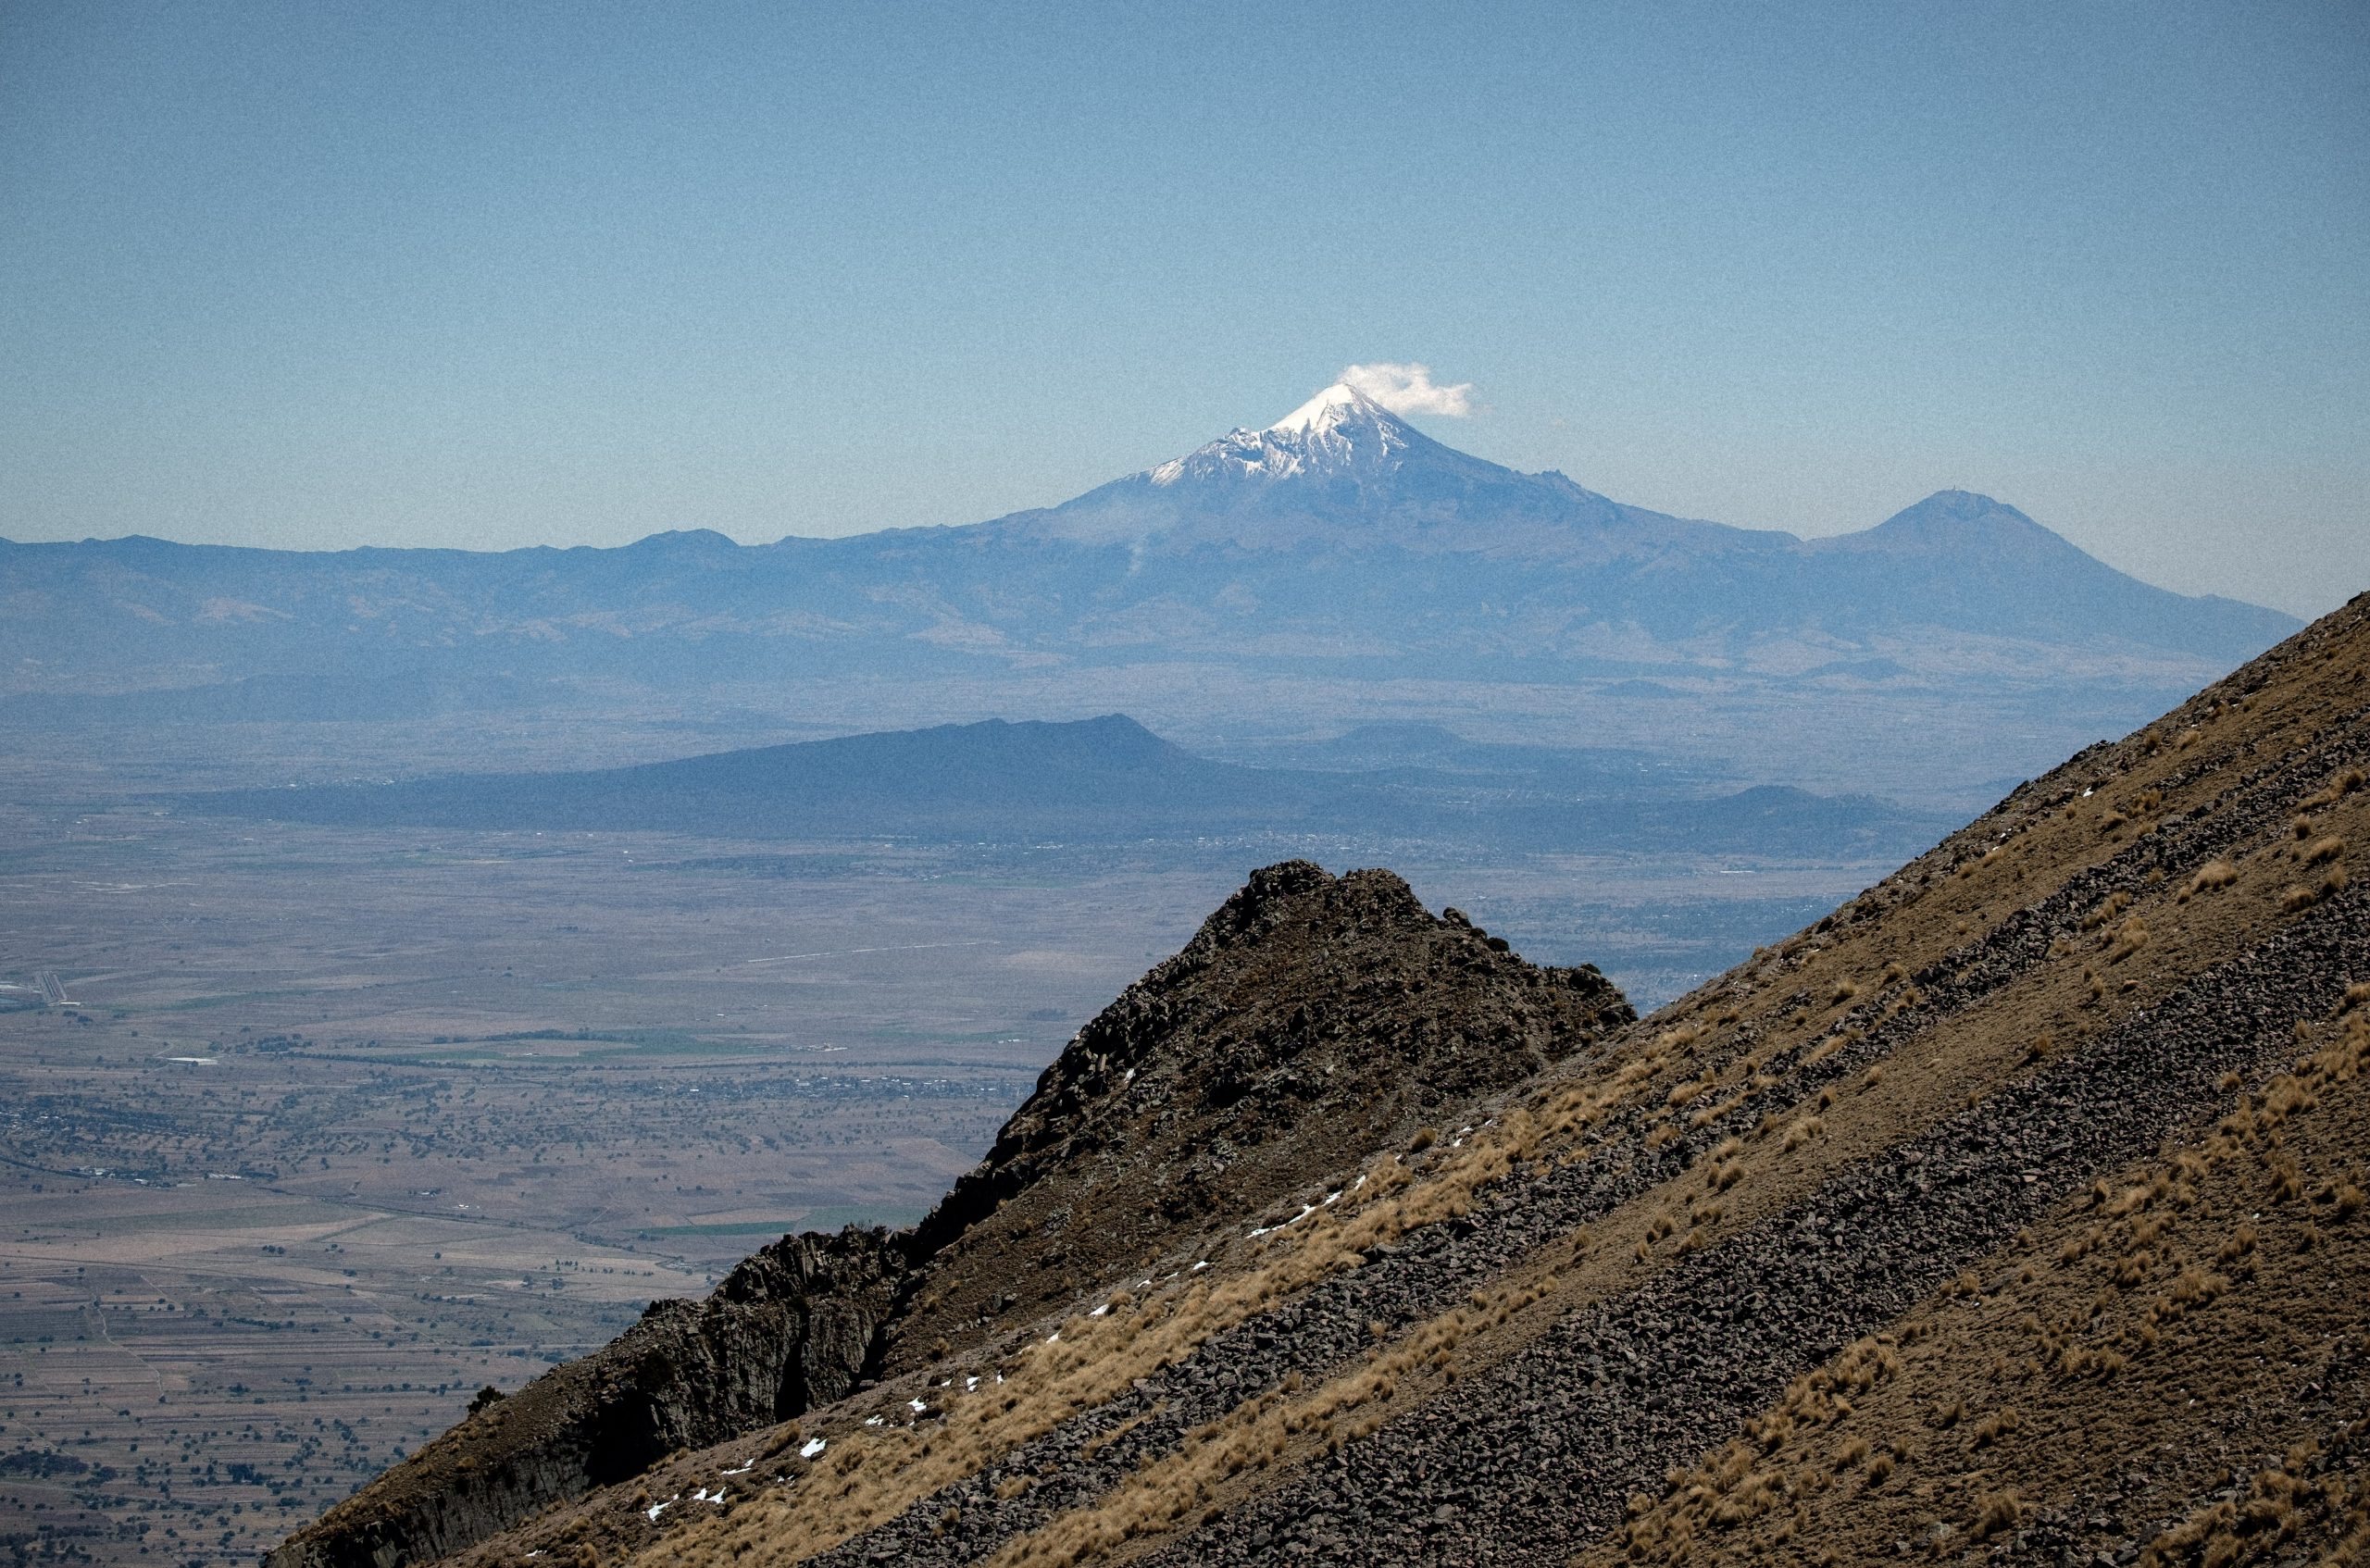
If you are in search of sweeping alpine views, fresh mountain air, and gorgeous hiking routes through varied terrain, look no further than Nevado de Toluca National Park. A popular spot for both experienced adventurers and locals making weekend trips to get a break from urban life, this rich area offers something for everyone. Located about 135 km southwest of Mexico City, Nevado de Toluca is a dormant volcano featuring two beautiful lakes lying within its crater. Though many visitors come just to see the lakes, there are many other excellent options for hiking within the park. Trails wind through forested areas and continue up into the rocky alpine, providing views of often snowcapped peaks which made us Canadians feel oddly at home. Trails leading to the different peaks dotting the volcanic rim offer exciting and challenging scrambling of different levels. The highest of these peaks is Pico del Fraile. Sitting at 4680 m or 15354 ft, this is the fourth highest mountain in Mexico. Based on our own firsthand experience summiting Pico del Fraile and camping on the slopes of Nevado de Toluca, this guide covers everything you need to know about how to get there, which trails to take, where to camp, and more.
6.6km one way (-1.5km if driving to the trailhead)
4,680m
900m
Easy to moderate scramble
19.1115310, -99.7766260
None
The route up to Pico de Fraile is a scramble, and should only be attempted by those with previous hiking/scrambling experience. You should be comfortable on exposed rock and should expect some basic route finding along the way. You will be going into the backcountry, so prepare accordingly! Pack more than what you think you need and be prepared for emergencies. This is a high elevation hike. Take the proper time to acclimatize, take care of your body, and know the signs and symptoms of altitude sickness. Speaking from experience, the weather changes rapidly so check the forecast regularly and don’t risk it. Always remember that you can turn around if needed. We have also heard some accounts of illegal logging camps in the area of Parque de Los Venados. We did not experience any issues but it’s something to be aware of.
By Car
Getting to Nevado de Toluca by car is quite self explanatory and can save you a lot of time compared to taking the bus. However, if you are coming from Mexico City, be aware that a lot of time will be spent just crossing the city since traffic can get quite congested. Depending on the time and day, allow for about 3 hours to get to Nevado de Toluca. If you are renting a car, also be aware of scams. Our friends were pulled over by cops in very non-legit looking uniforms and asked to pay a large sum of money immediately after leaving a rental place in Mexico City.
To get to our recommended route, you do not have to drive all the way up to Nevado de Toluca National Park. You will drive through the entrance of Parque de Los Venados, which costs 50 pesos per person. continue along this road to the trailhead parking, marked as “Sendero Arenal” on google maps. There is a small parking lot here with space for several cars. The last 5km of this road is not paved, however it is in pretty good condition and doable in vehicles with 2WD. We have heard that it is advisable to avoid the whole area around Nevado de Toluca on weekends if at all possible. Traffic can apparently get quite crazy and if you are planning to drive all the way to the top, you may have to park further down and get a shared vehicle to the top as the upper portion of the road is closed on the weekends.
By Public Transportation
Since we are on a tight budget, we opted to avoid getting a rental car and used public transportation to get to and from Nevado de Toluca. We found the whole process quite simple and enjoyable, though it did take some time. If you are coming from Mexico City, make your way to Central de Autobuses de Observatorio/Terminal Poniente. The metro used to run all the way here, but as of February 2025 it was closed and we had to transfer onto a bus for the latter half of the journey. From the terminal, you can get a direct bus to Toluca through either the Zina or Caminante bus lines. Buses run every 15 minutes starting at 6am and cost around 115 pesos pp. Duration is around one hour and 15 minutes. Alternatively, you can make your way to Taxquena Terminal del Sur station where you can get a direct bus through ETN Turistar for 171 pesos pp. There are 5 buses a day, 8:30am being the earliest. Duration is 2.5 hours.
All of the buses will drop you off at Terminal de Toluca de CV, which is the main bus station in Toluca. You then catch a bus to Raices from this same station, the next stop in your journey to Nevado de Toluca. Zina bus departs every half hour or so, and it cost us 58 pesos pp. Duration was one hour and the bus was large, comfortable, and air conditioned. You will get dropped off right on the main street of Raices, which is a quaint little town with a few local restaurants. From here, it is not hard to find a ride to Nevado de Toluca. There are many taxis in the area, some official and some just local cars, and drivers will likely be offering you rides before you even have the chance to ask. We paid 200 pesos between three of us to get to the entrance of Parque de los Venados. Don’t be afraid to negotiate.
It is a good idea to stock up on all the food and water you will need for the hike before leaving Toluca, as resources in Raices are fairly limited. There is a giant Walmart right behind the bus station that will have everything you need.
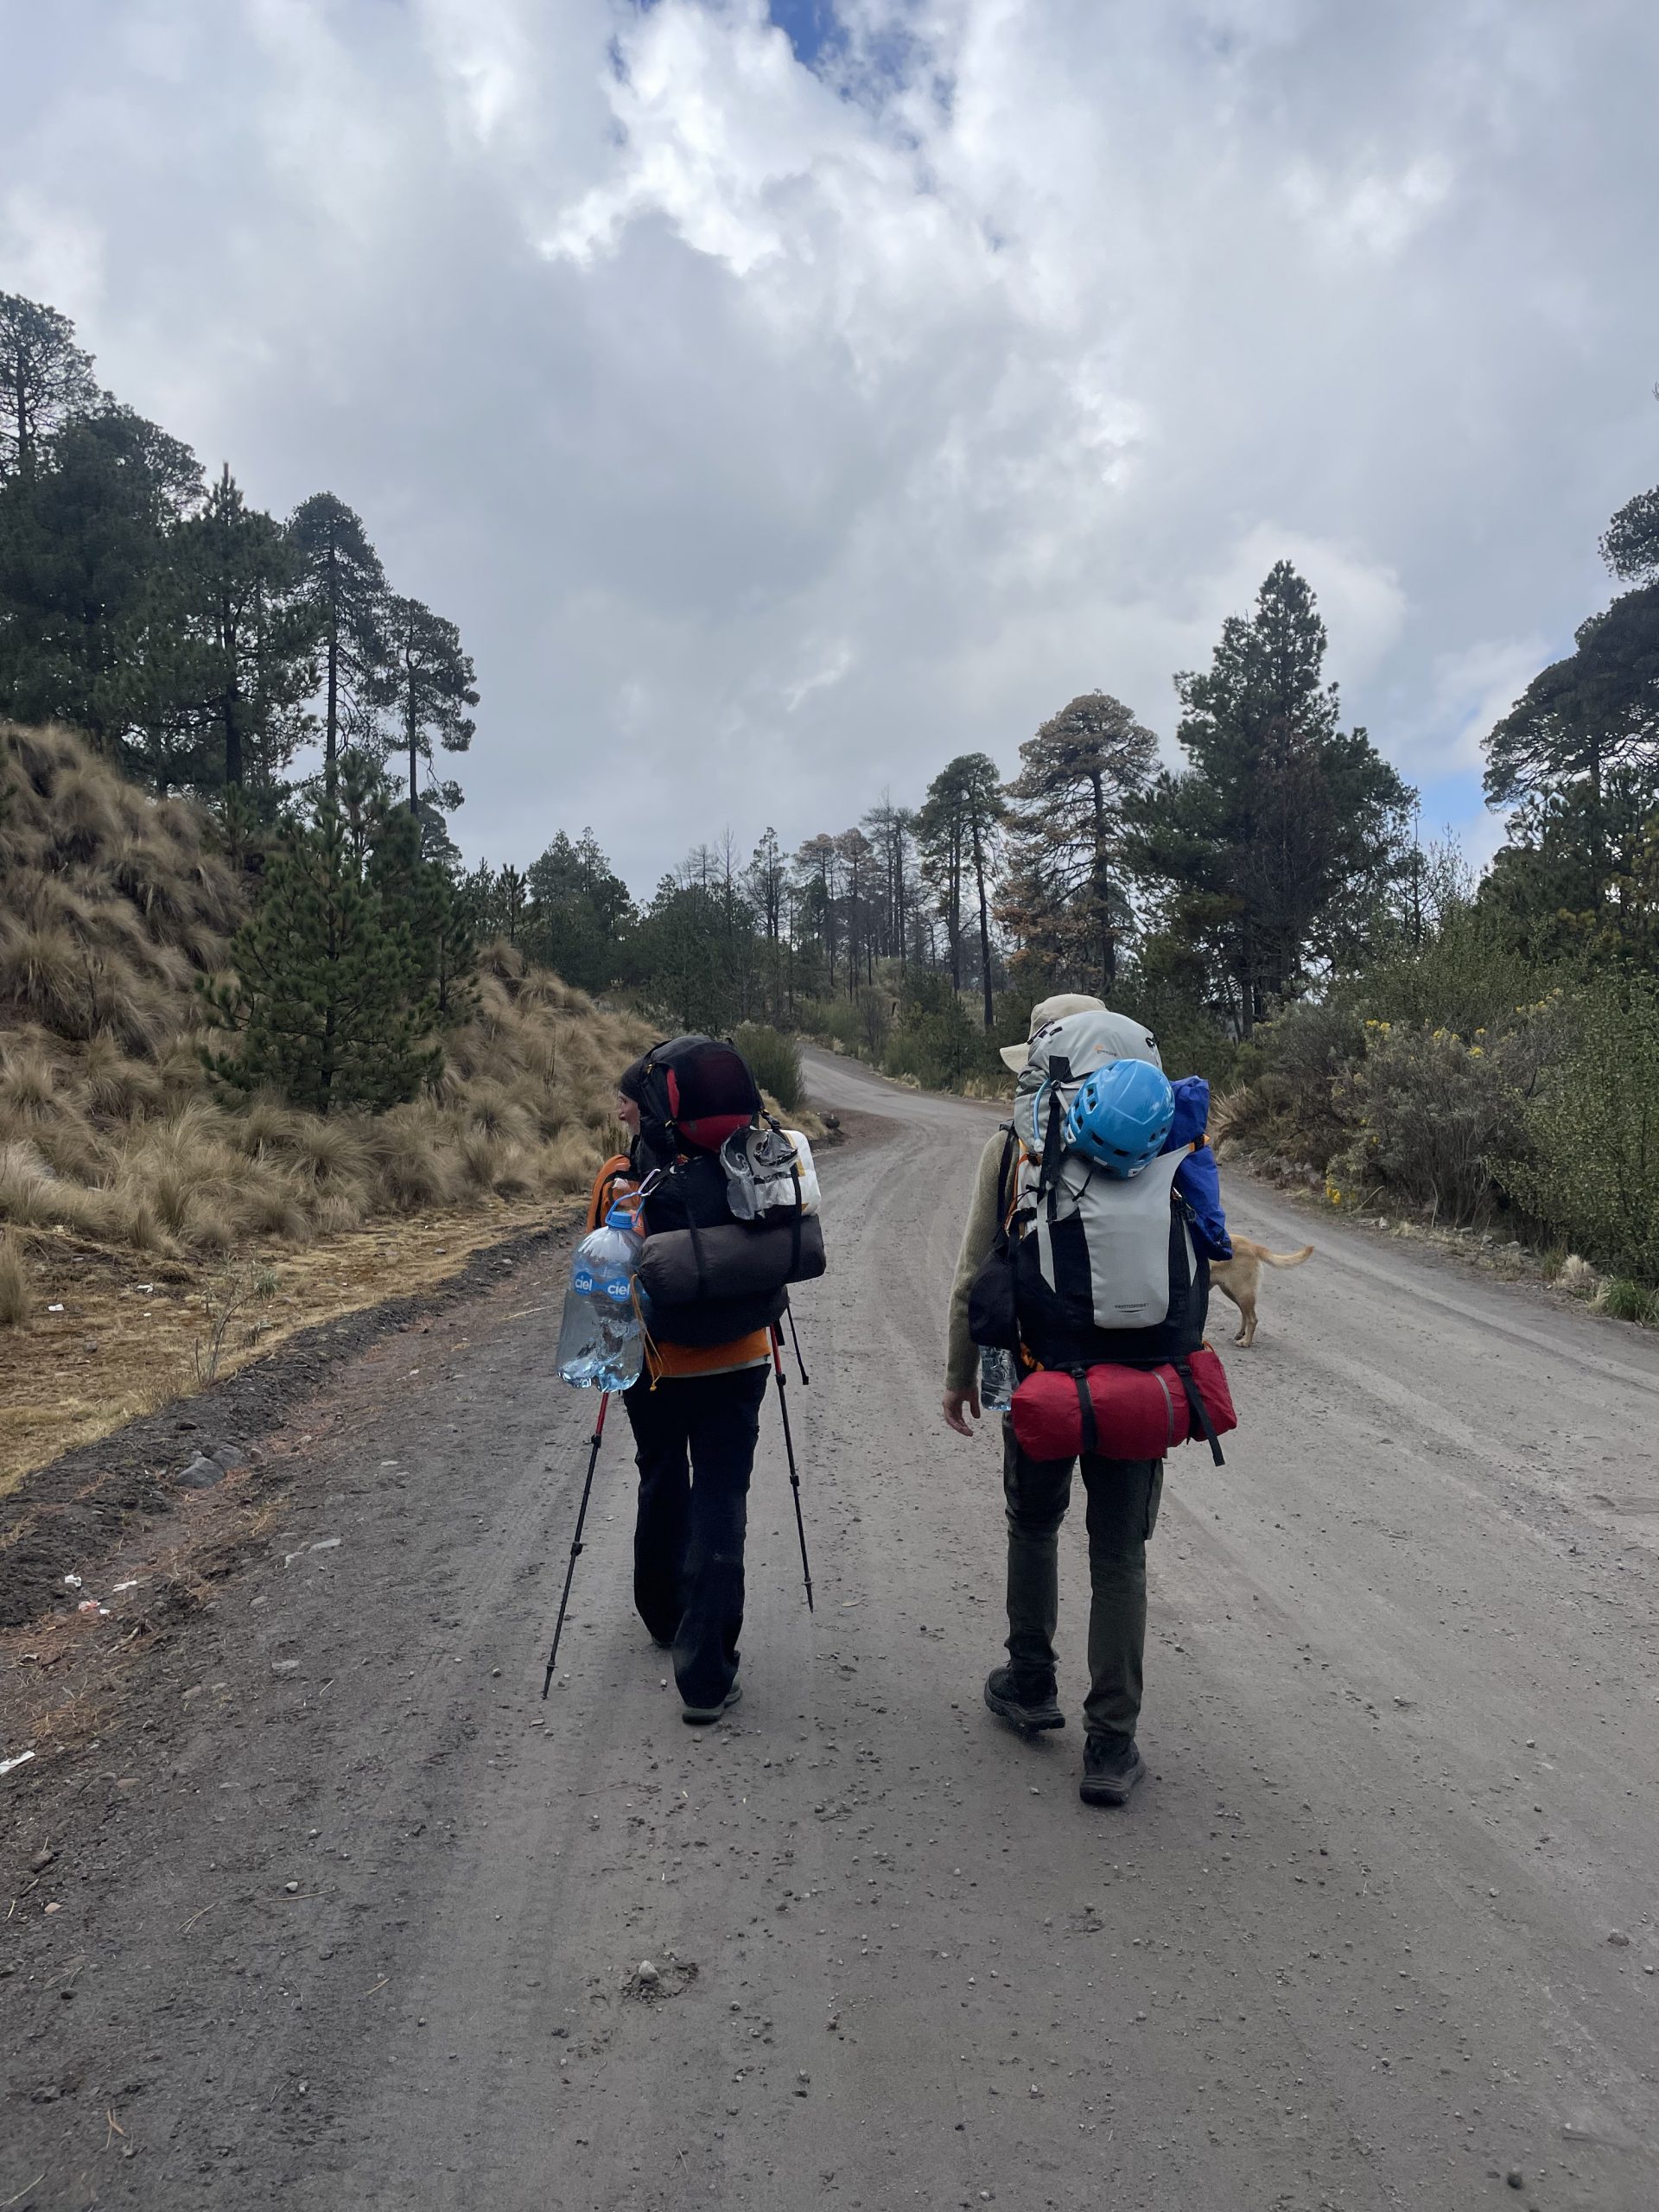
If you are following our recommended route, ask your driver to drop you off at the entrance to Parque de los Venados, where it is a 1.5 km hike to the trailhead. It might also be possible to get dropped off right at the trailhead, but then the taxi would have to pass the gate and pay the fee of 50 pesos pp. We passed through the gate to the park on foot and there was a guard there that just waved us on through, and we did not have to pay anything. This being said, I am not sure if this is always the case or if we just got lucky.
One of the great things about Nevado de Toluca is the abundance of different routes that you can take depending on the difficulty level and objectives that you are aiming for. Below, we have outlined the major routes that take you out of the crater and up the volcanic rim. All of these routes involve some degree of scrambling, so if you are looking for something more simple it is advisable to choose one of the other wonderful trails in the crater that offer up-close views of the stunning volcanic lakes. Different routes can of course be combined together to form different loops to tailor your adventure as you wish. Note that these 3 trails start near the main entrance of Nevado de Toluca, not at Parque de Los Venados.
Combining several peaks into one long rim traverse, this route is challenging and technical. Expect sustained class 3-4 scrambling and route finding along the rim.
Often referred to as the East Ridge route, this trail is a bit less demanding than the complete rim traverse but still not to be underestimated! It features some fun class 3 scrambling and includes the summit of Pico del Fraile.
This is a more direct route to summit Pico del Fraile. This route still involves some class 3 scrambling right near the top, but is a less technical scramble than traversing the rim. However, you will have to contend with a steep ascent up loose scree if you choose to ascend this route.
We were very determined to camp on Nevado de Toluca, partially for acclimatization purposes and partially for the views and the unique experience. After doing some research, we were not even sure if this was possible without having permits or a vehicle to car camp in. Well, we found this route and it was the answer to our prayers! This hike could be done in one long day, however we recommend splitting it up into two more relaxed days which allows for maximum appreciation of the beautiful scenery! We speculated afterwards that our camping and hiking experience at Nevado de Toluca was definitely a contributing factor in our successful climbs of Malinche and Pico de Orizaba shortly after.
Starting from the gate at Parque de los Venados, you can either drive or hike 1.5 km down the dirt road to the trailhead, marked as Sendero Arenal on google maps. Allow for at least 20 min if you’re hiking. Once you reach the trailhead, follow the small clearly marked path into the woods. This will take you all the way to the summit.
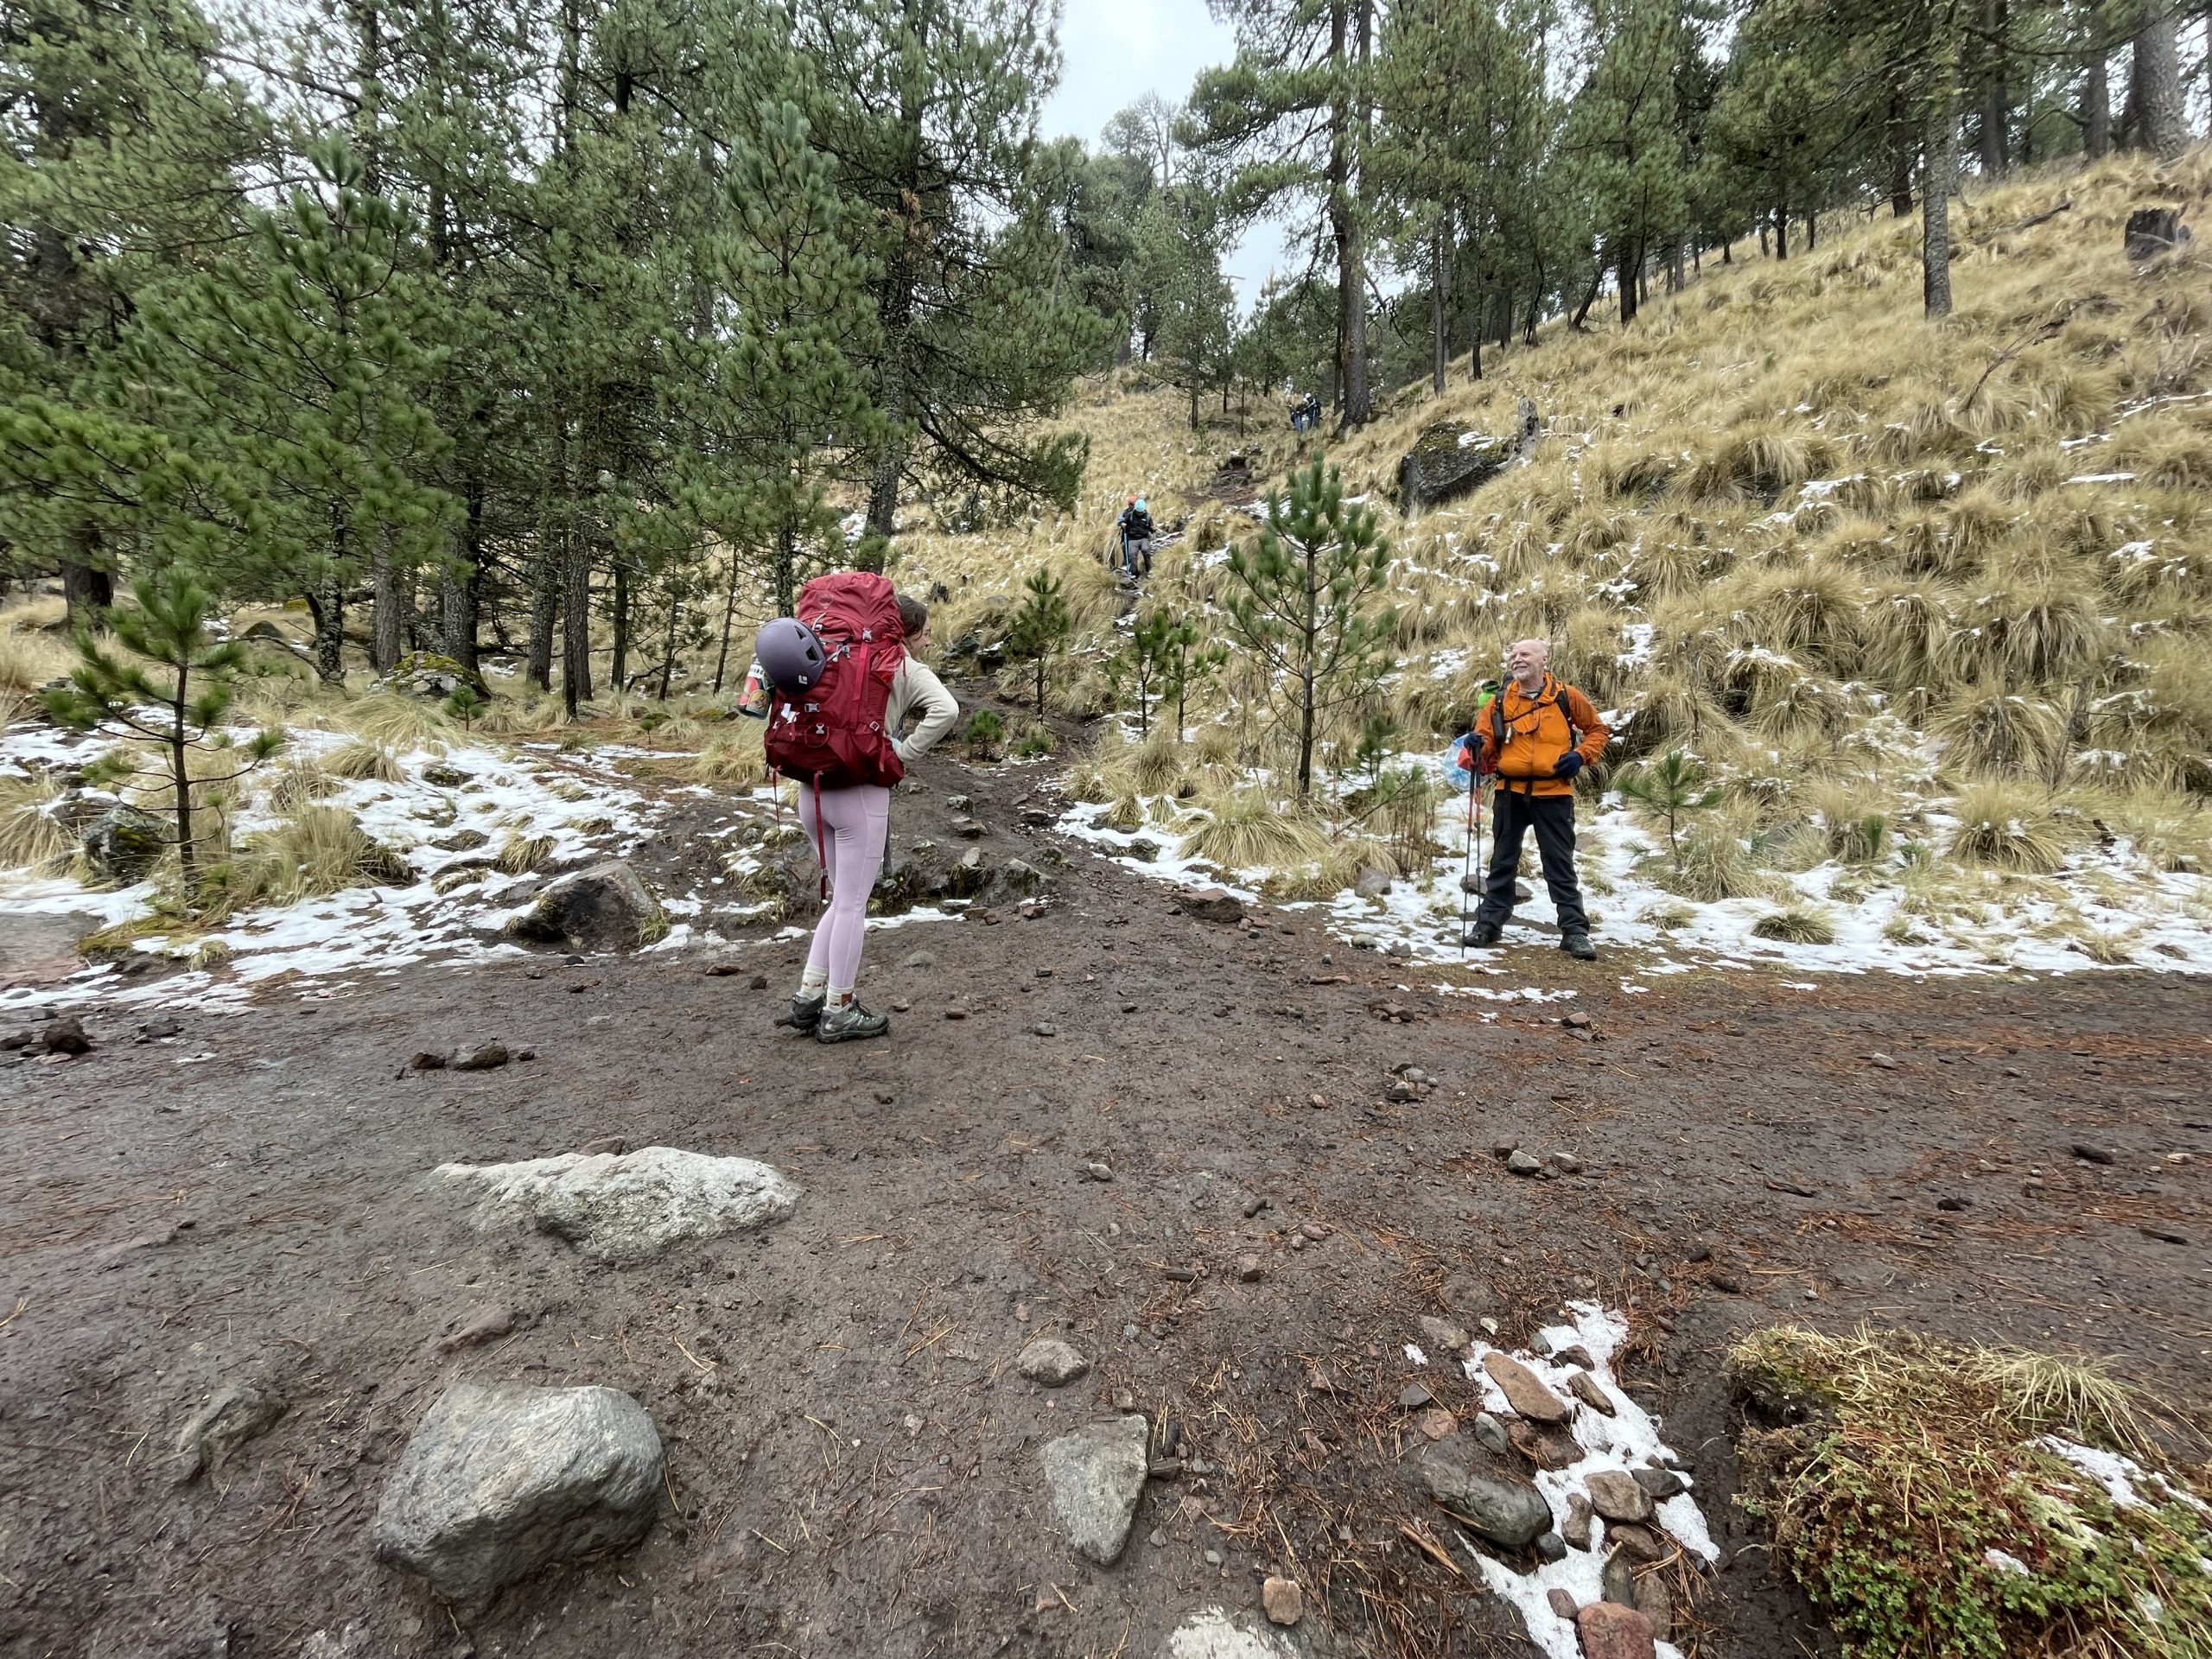
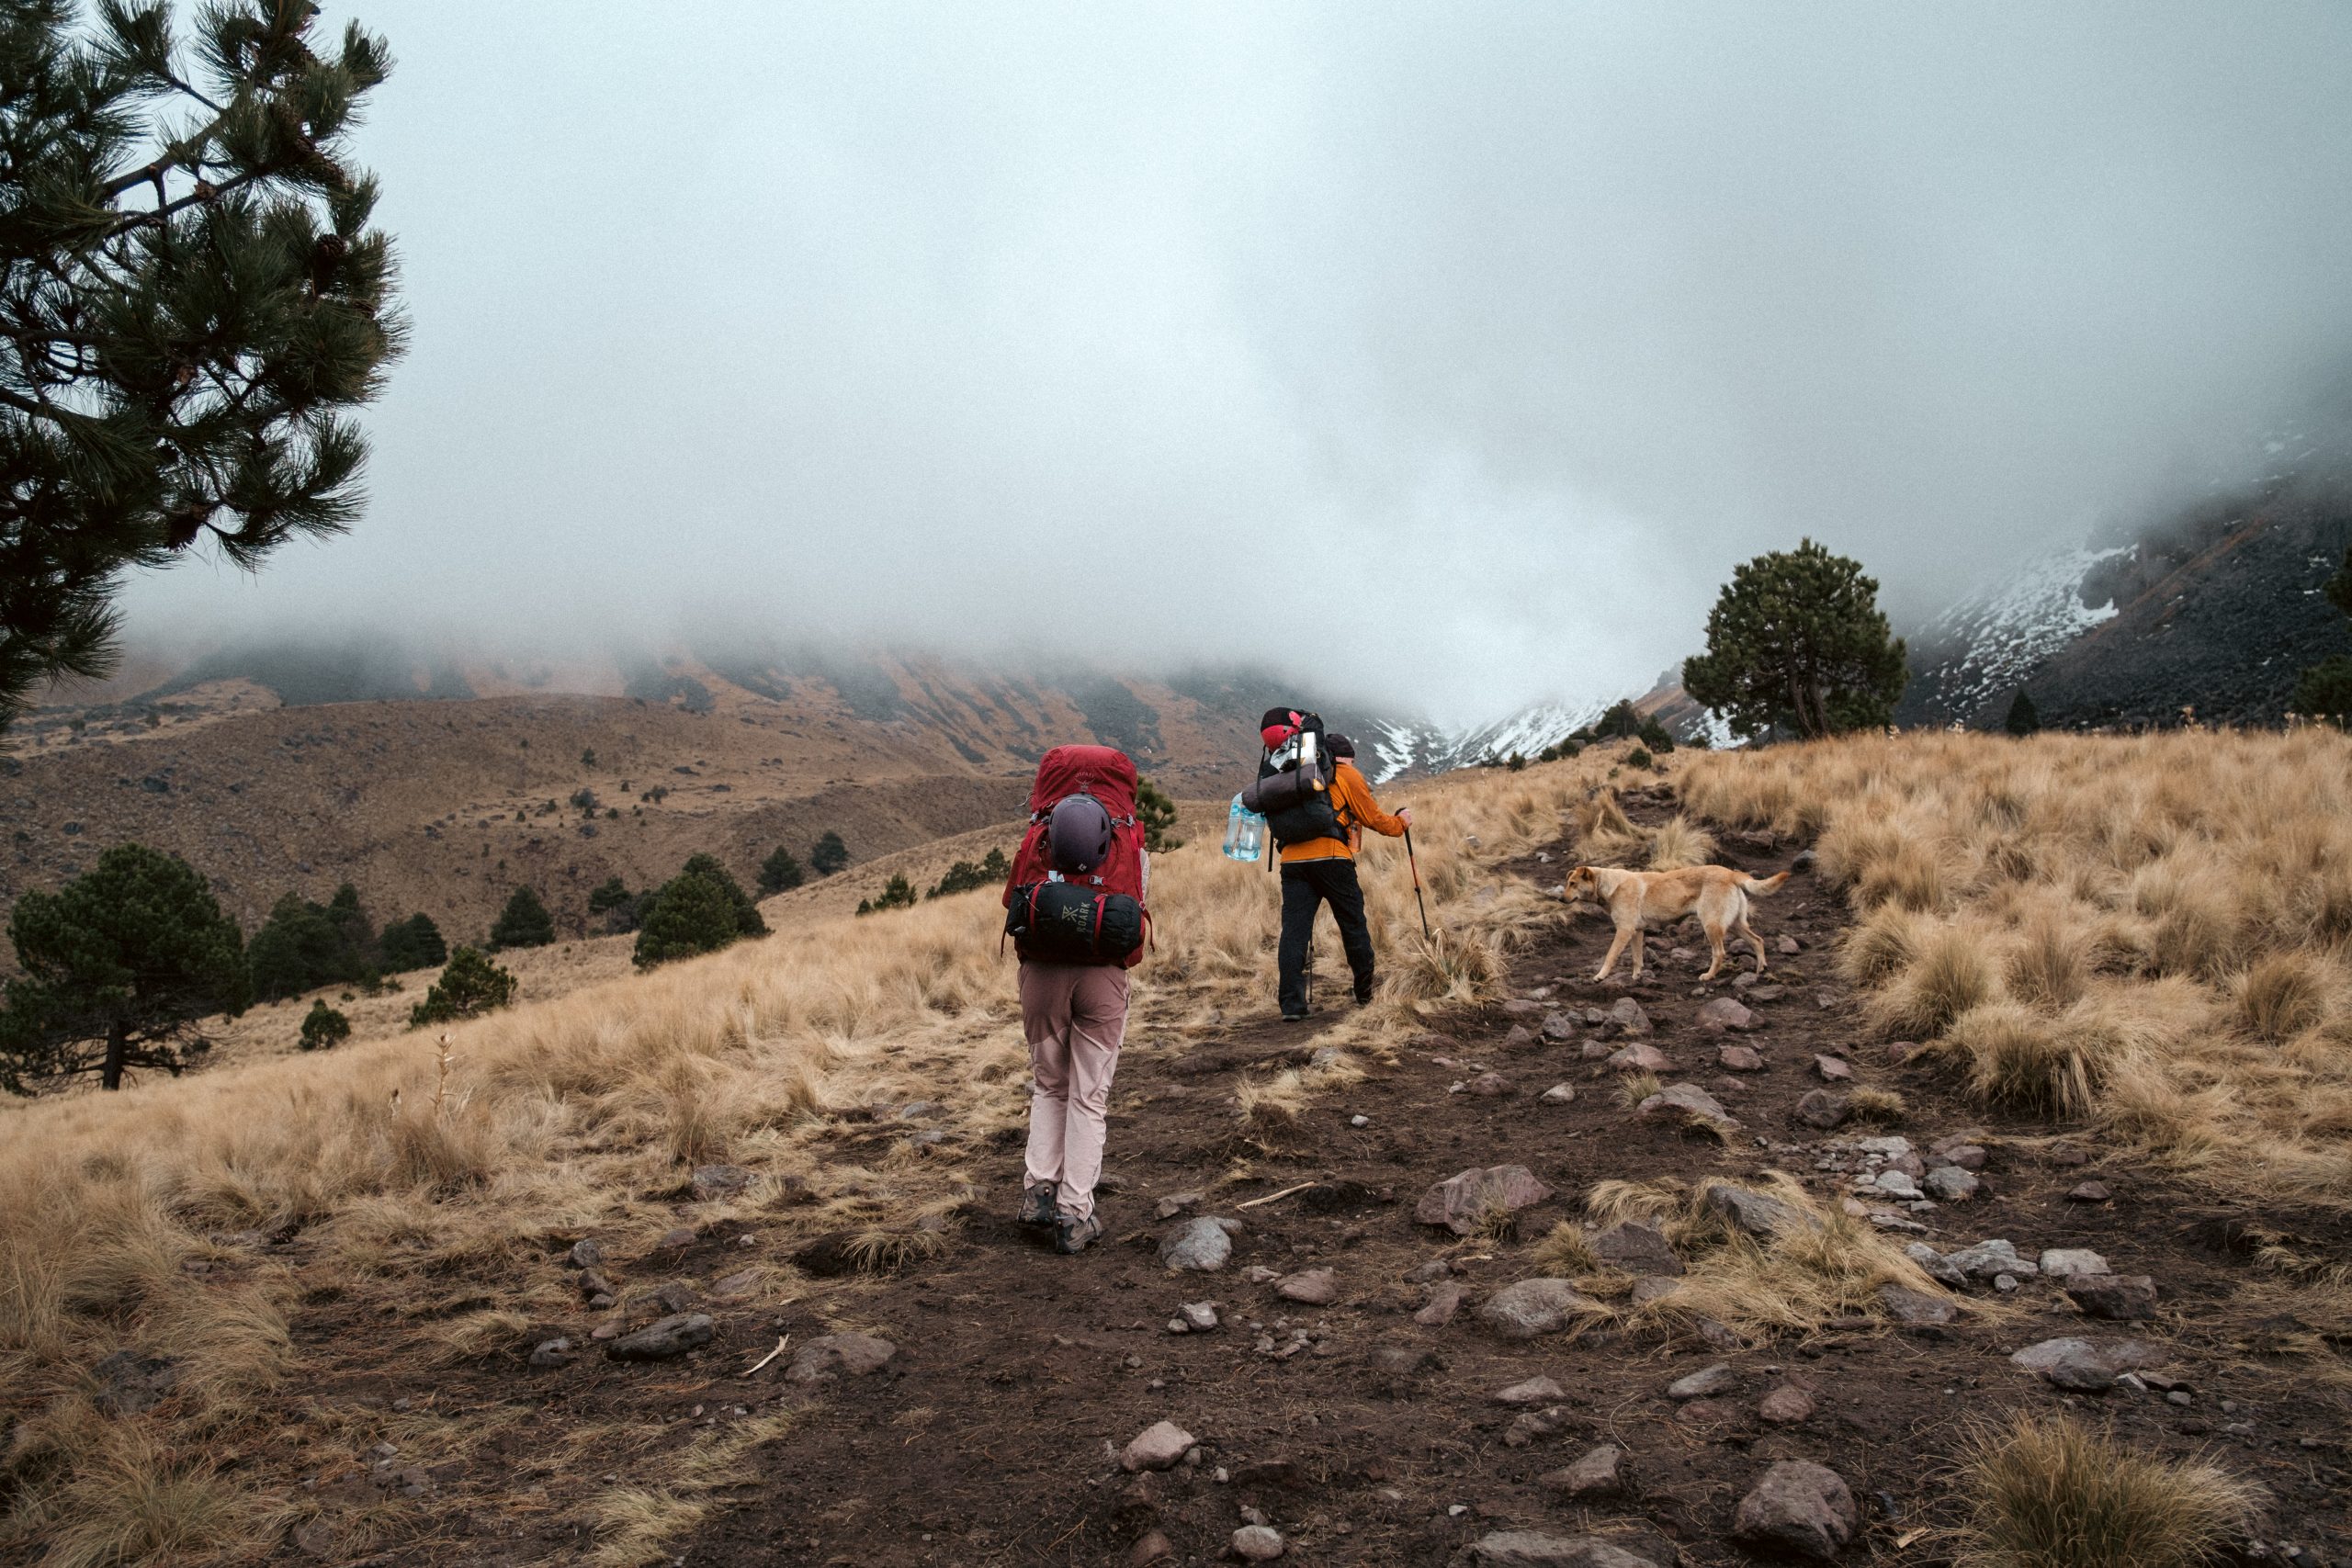
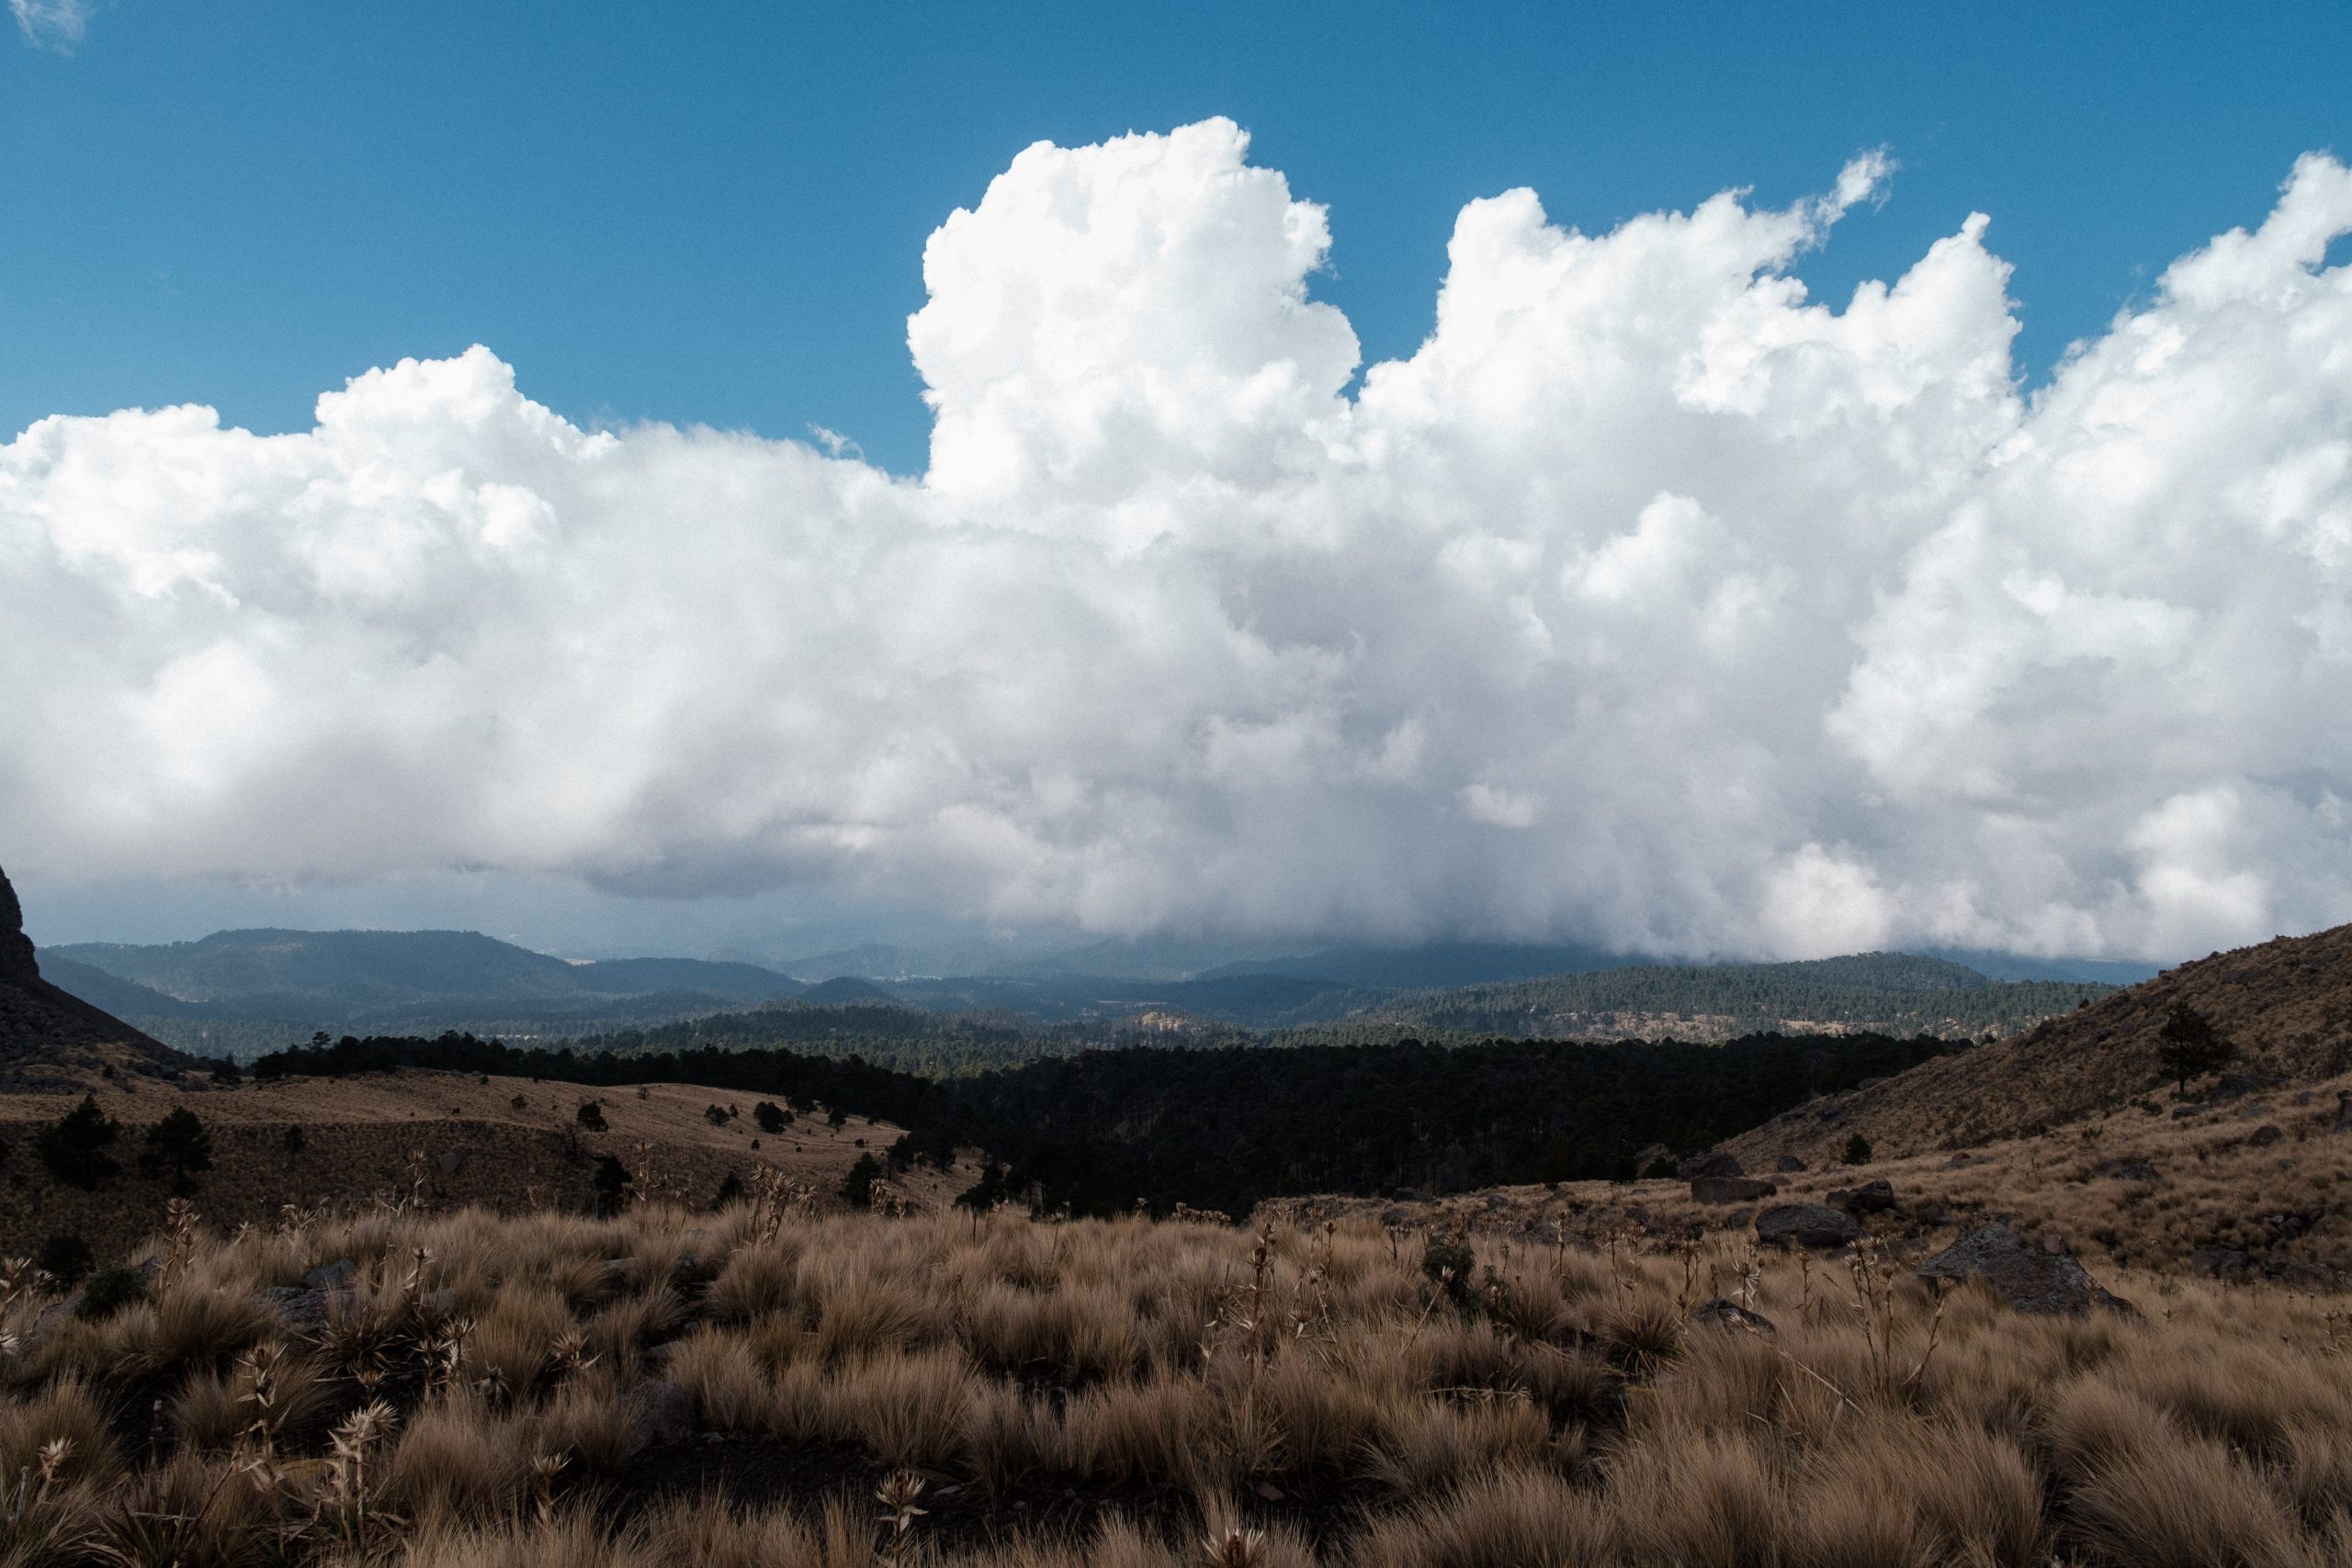
Eventually, the trail starts to get steeper and you will slowly rise past the treeline and crest a large grassy bank. Prepare to be amazed, because this is where the views really start to open up. Dramatic mountains lie ahead, and an expansive valley lies behind. If it’s not too cloudy, you’ll finally get a look at Nevado de Toluca and Pico del Fraile. The trail evens out for a bit as you follow along the top of the bank.
If you choose to camp in the area that we marked (19.1115310, -99.7766260) you will have to leave the main trail and cross the gully to reach the parallel grassy ridge to your left. There is a faint trail going across near the end of the gully that’s closest to the mountains, but it’s mostly a choose your own adventure kind of situation. We aren’t going to lie, this is a fairly sizeable gully and can somewhat kick your ass after a long day of hiking (and of course add some extra time to your morning the next day!). You also have to watch your footing in the grass here. However, you will be rewarded with nice cleared and flattened areas to pitch your tent. This campsite appears to be used and maintained by guide companies. During the two days that we were there, we did not encounter any other campers. It is quite a large area, so we doubt that there would be any issues finding a space here. If there was an issue, or if you simply don’t want to face the gully, we don’t see why you couldn’t set up camp on the other bank on the right or somewhere else in the grass a bit further away.
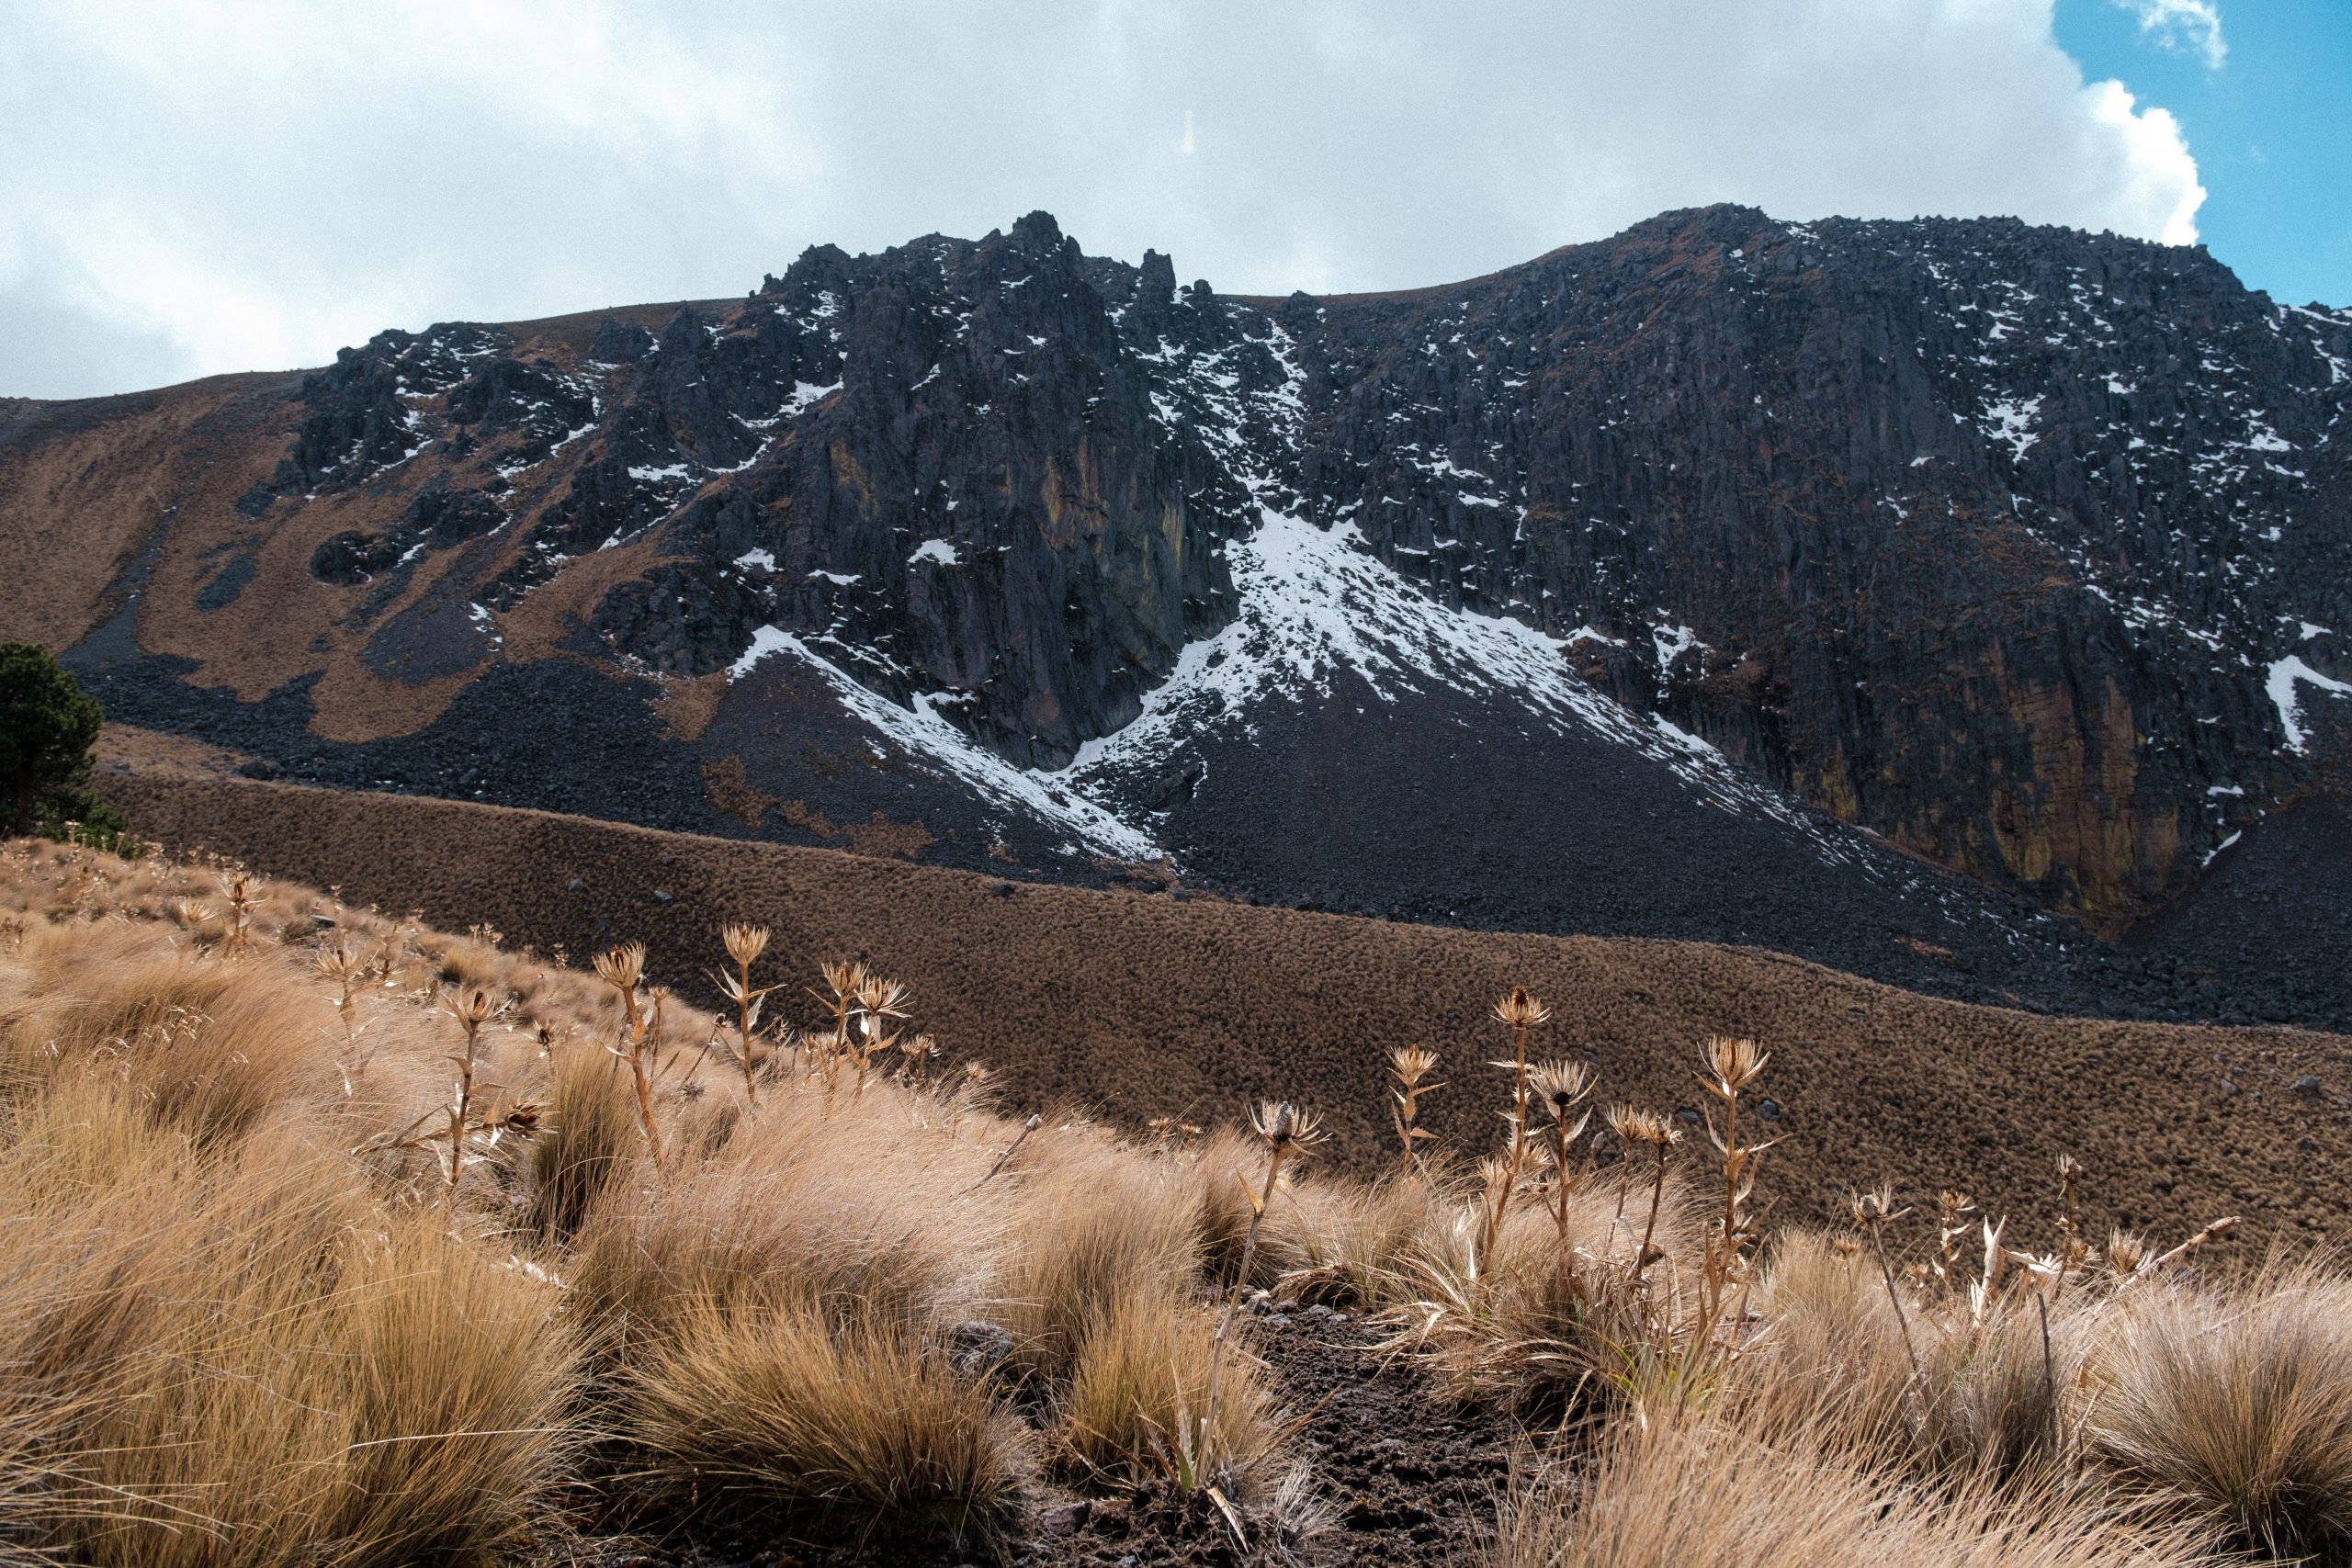
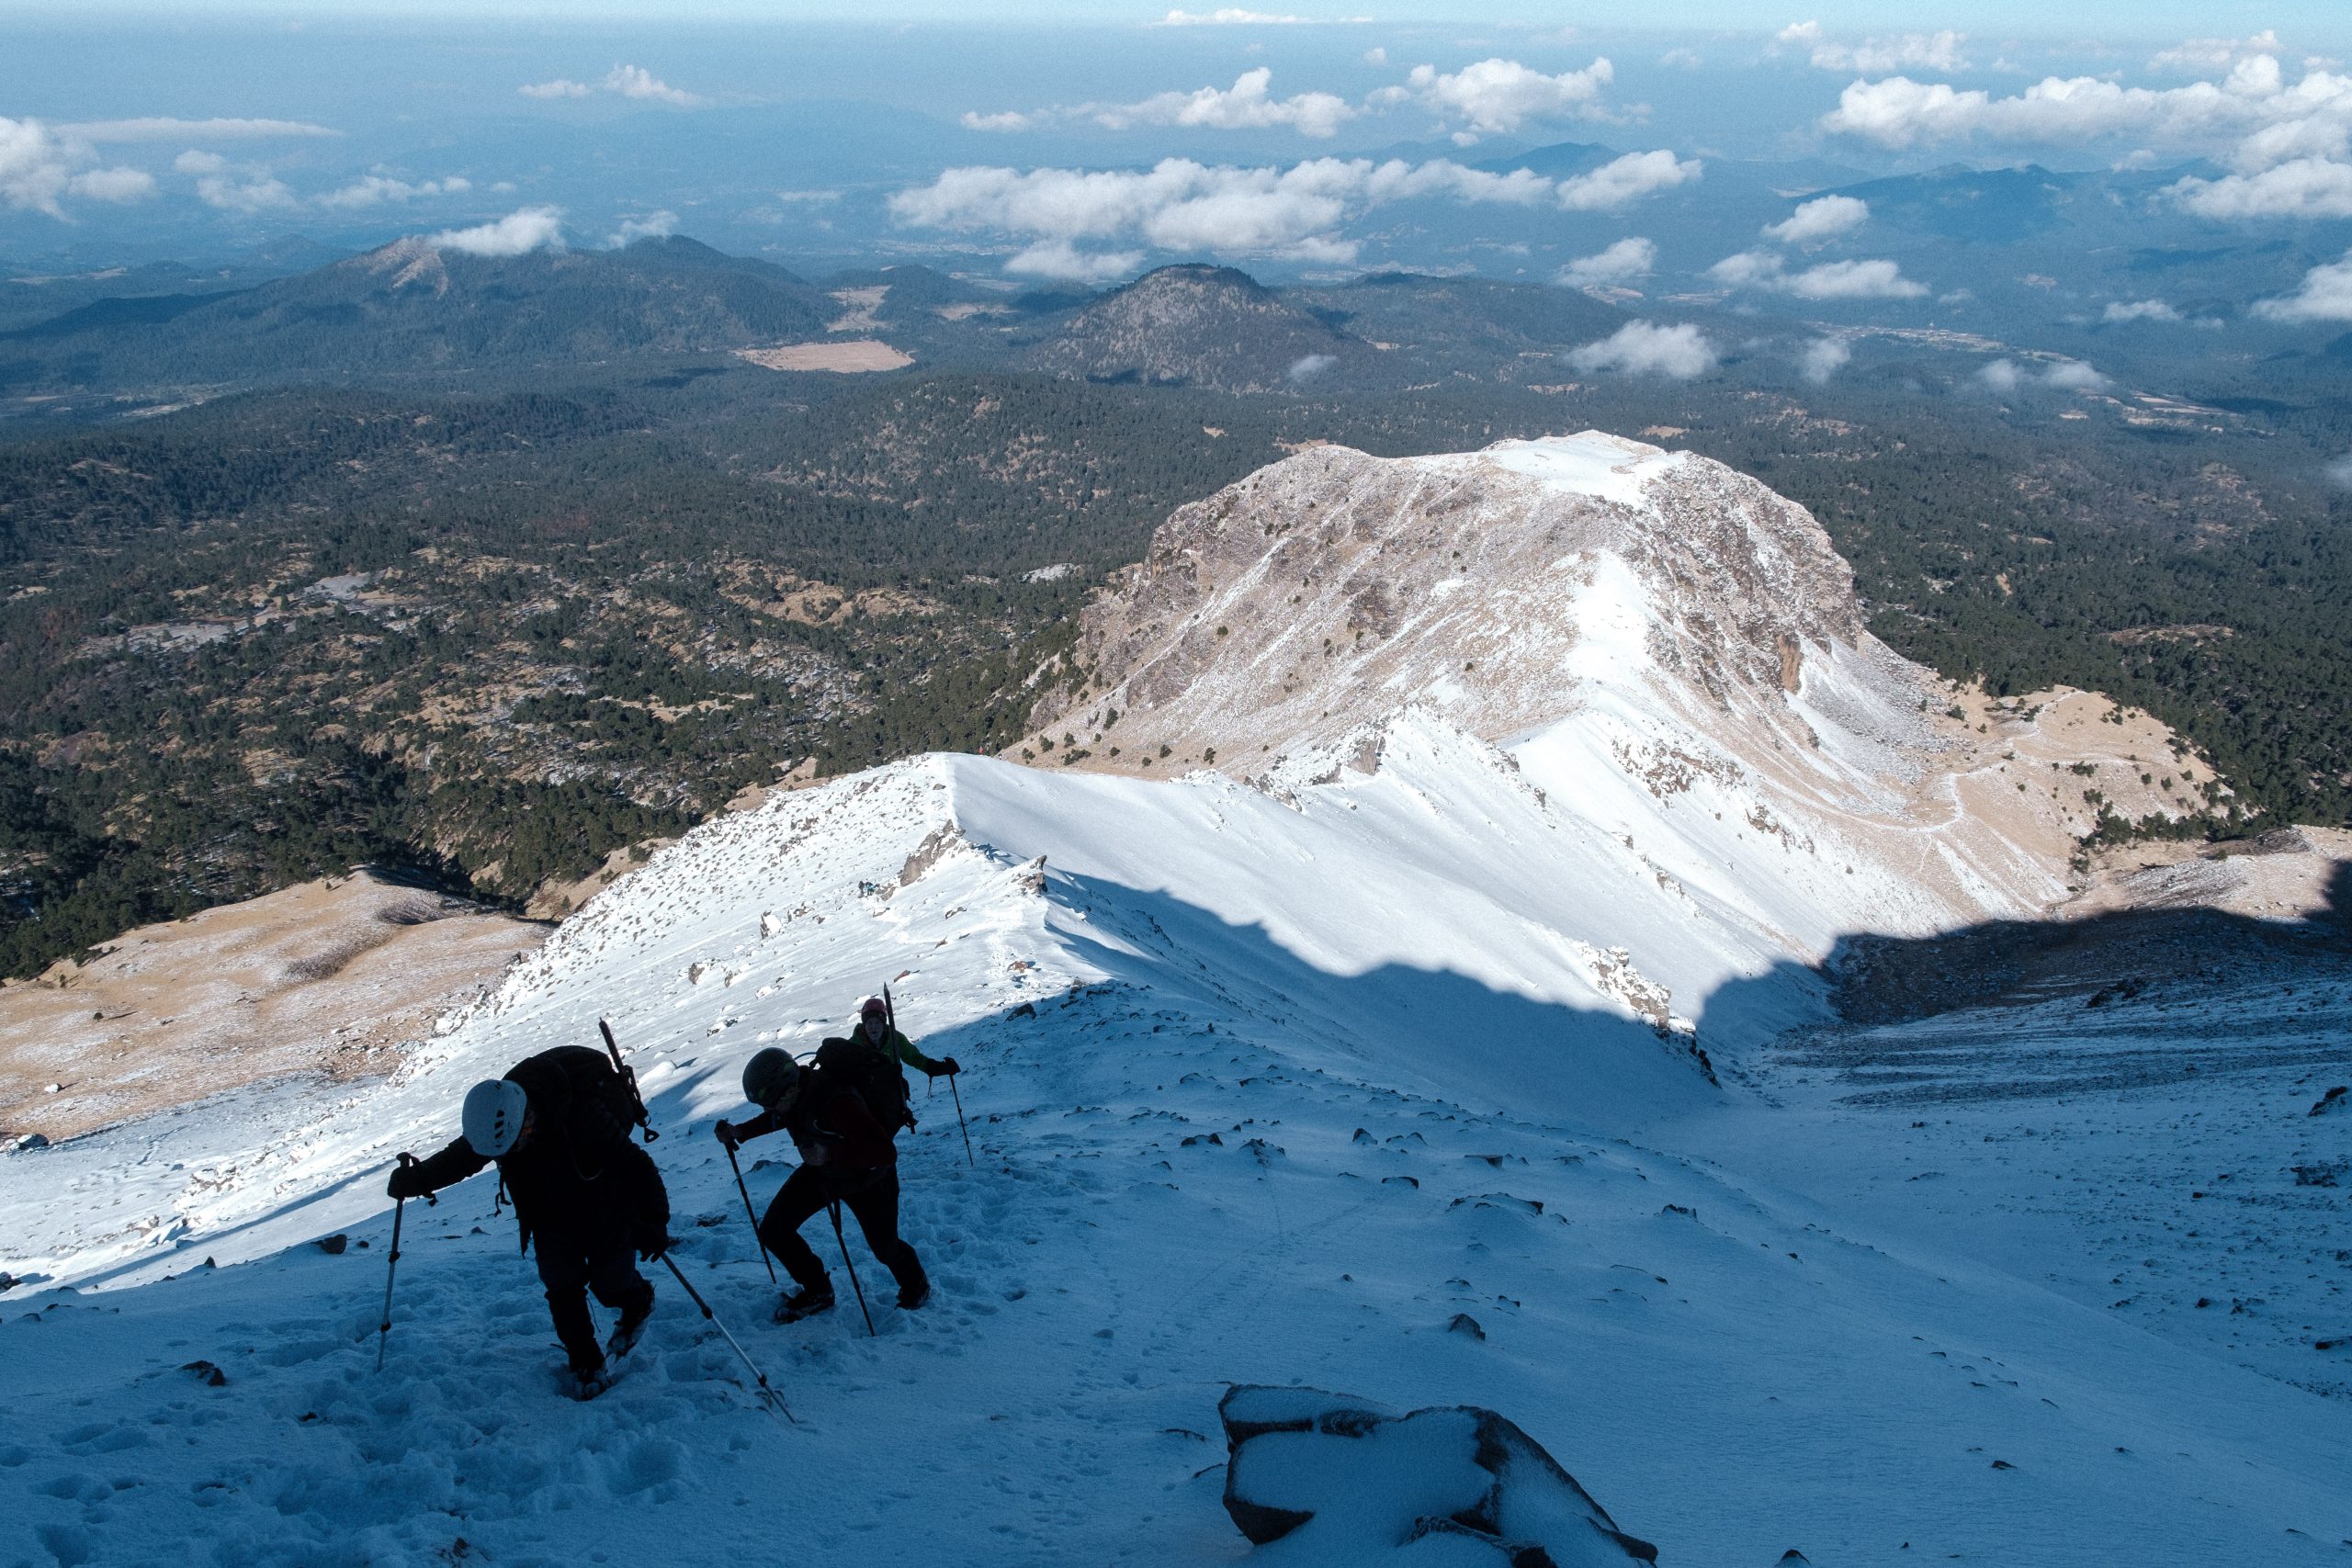
Once you’re ready to attempt to summit, whether you choose to go for it on day 1 or the next day, head back to the first grassy bank and the main trail. The next step is to ascend a short, steep section consisting mostly of loose scree. This leads to the top of a ridge, which offers great views of the other side of the mountain. This is an excellent spot to stop for snacks, and it is also a good point to stop and assess conditions since the trail begins to get more scrambly from this point forward. The trail essentially follows this ridge all the way to the summit of Pico de Fraile. The last 20 ft or so before you reach the volcanic rim gets a bit steeper and has a bit more exposure.
Once you finally reach the top of the volcanic rim, you are rewarded with incredible views of the crater and the lakes below. Then it is one final, short push with some exposure to the summit of Pico de Fraile, and you’ve made it to the top of the fourth highest peak in Mexico!
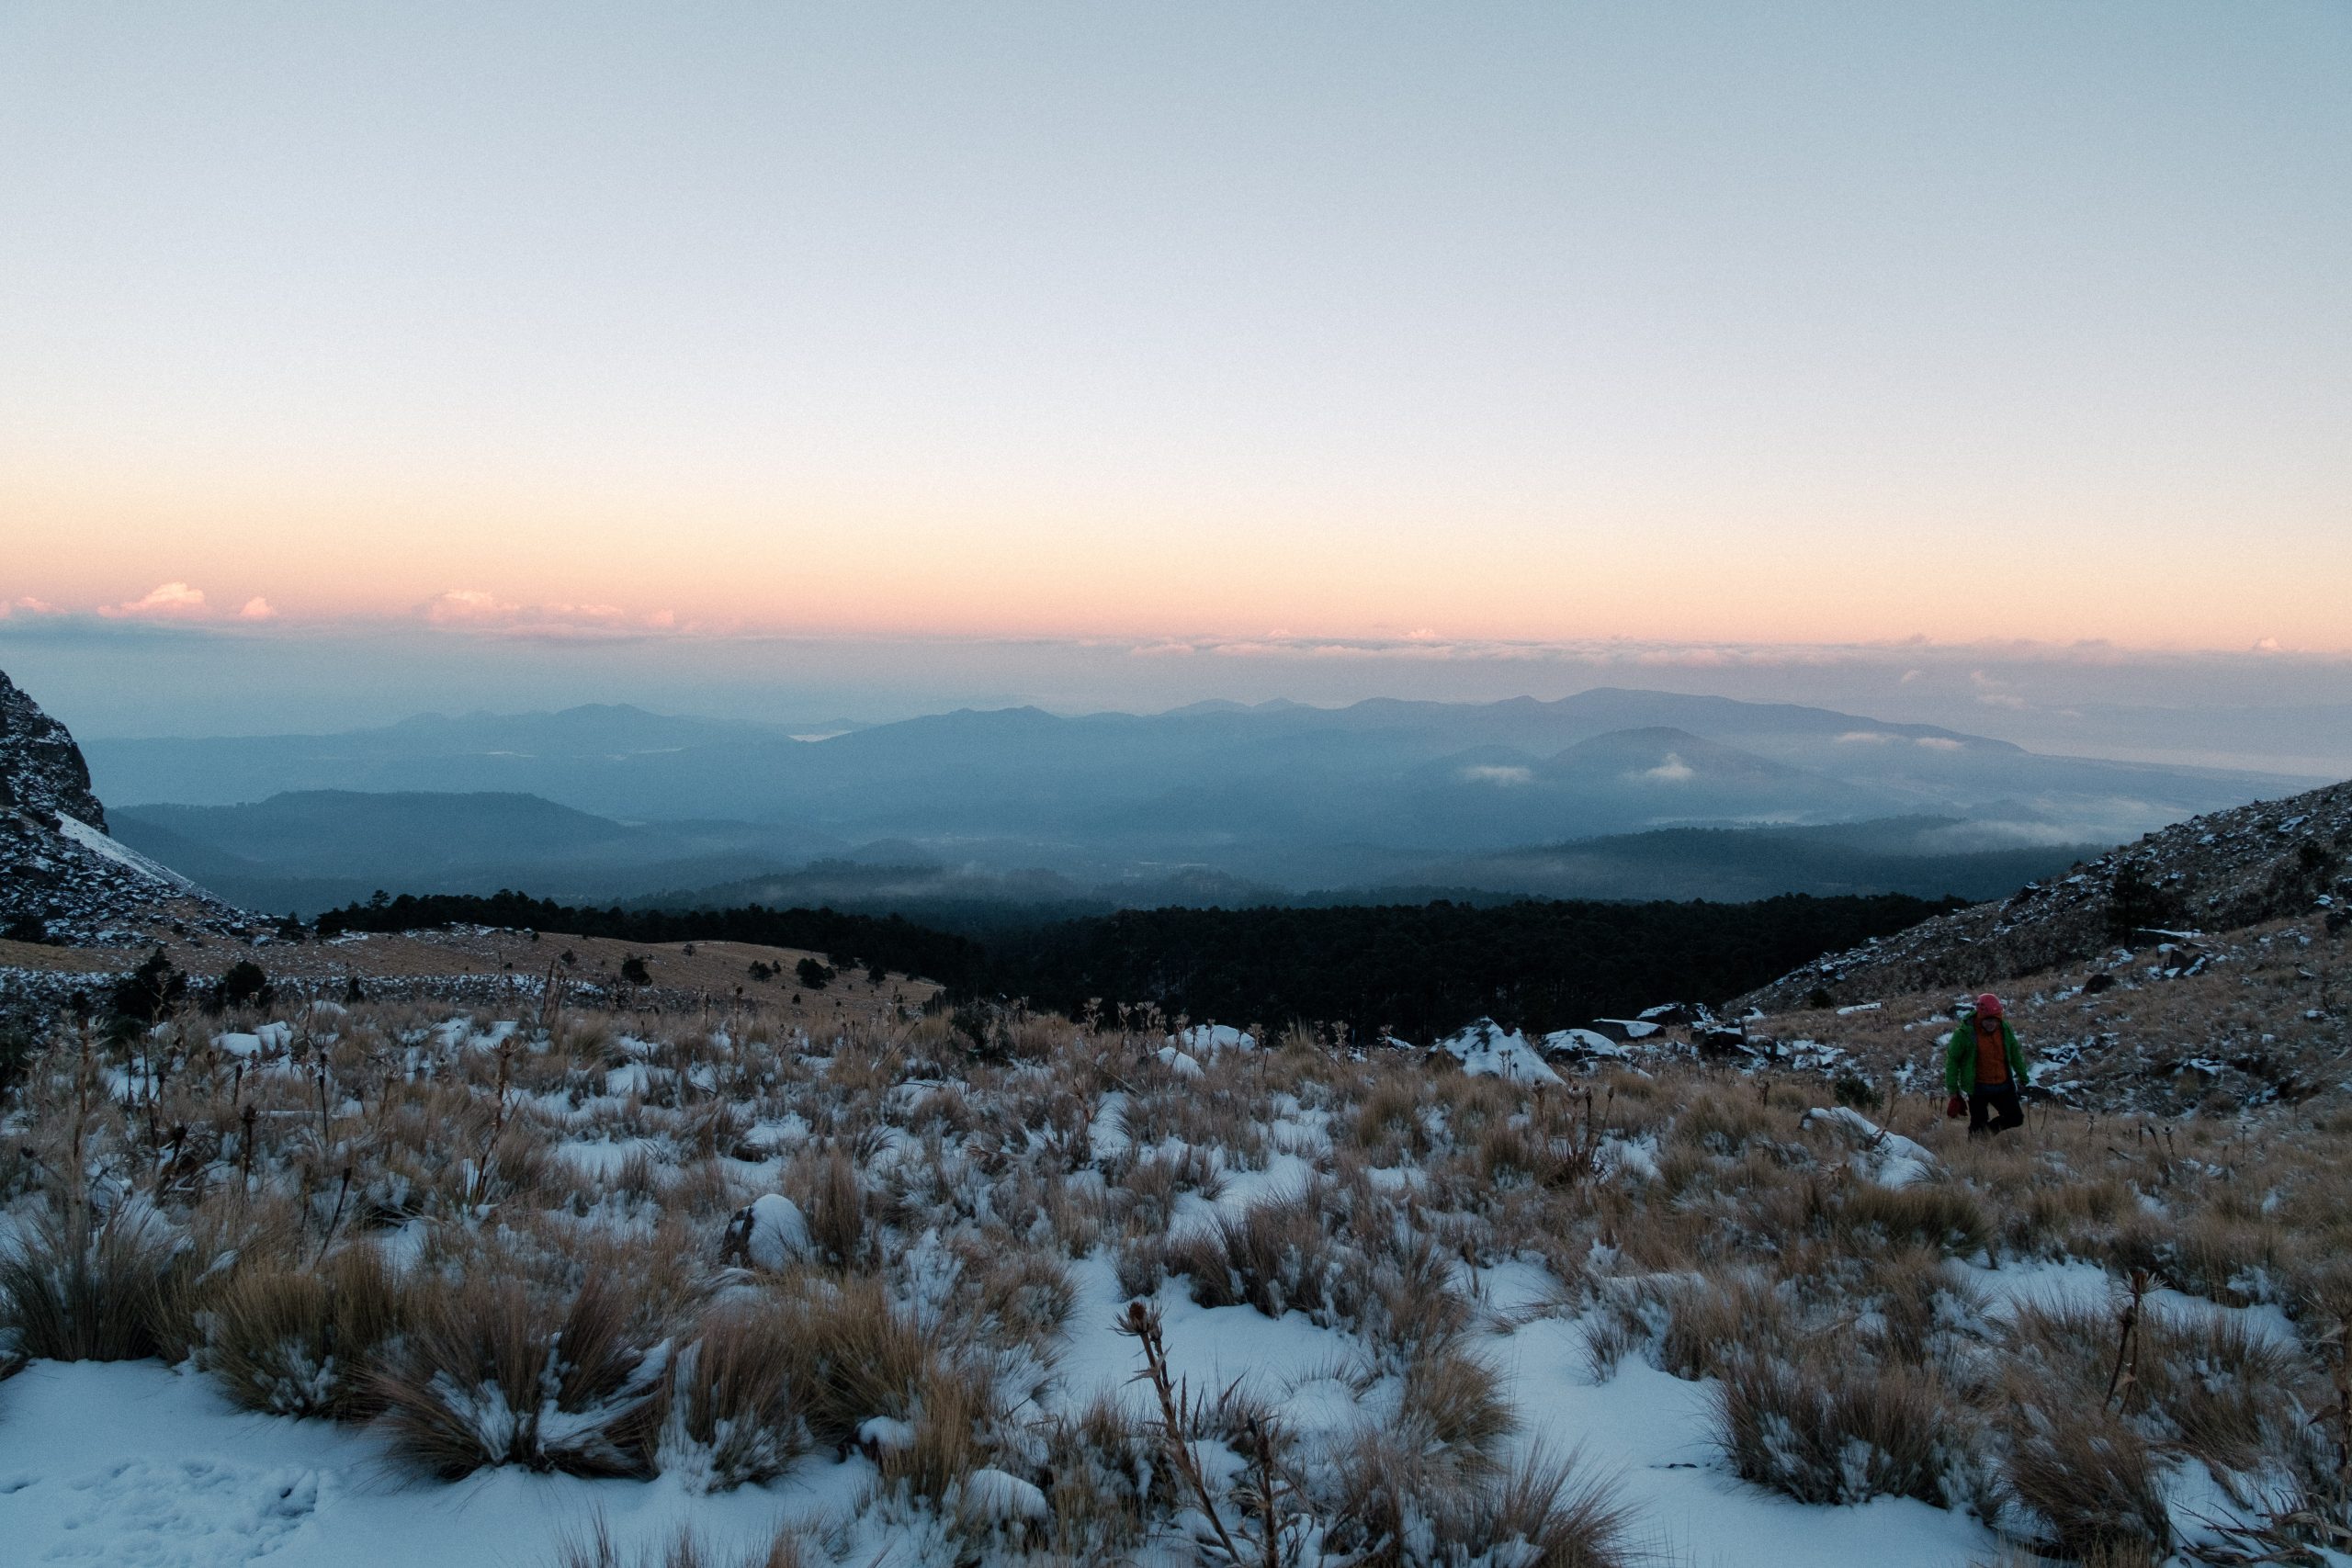
November to February is typically considered the best time of year to hike in Mexico since the weather is typically clearer and there is less of precipitation, significant amounts of which would make this hike much more challenging. We did this trip on February 21st and 22nd. On the first day we hiked up to camp and we saw that there was very little snow left on the rim. However, the night before our ascent the mountain received quite a bit of fresh snowfall. In other words, expect the unexpected and come prepared! We would not recommend doing this hike without crampons or at least microscopes and an ice axe if there is snow.
The hike up to the campground is quite manageable, even for those without a lot of hiking experience. From the trailhead to the campground there is 450 m of elevation gain, and the trail is not technical and well marked. From the top of the ridge to the summit, expect class 2-3 scrambling with some exposure. Even on the upper portion, the trail is straightforward and does not require much route finding. If you are traversing the top of the crater (like on this route: Xenantecatl) there is more advanced and exposed scrambling.
We came to Nevado de Toluca looking for an adventure, and boy did the mountain deliver. We will certainly be adding this trip to our list of unforgettable hikes, and that’s not only thanks to the insane views. If you’re curious to hear why, read on for a brief account of our experience climbing Pico del Fraile.
Jeremie and I were about two weeks into our grand backpacking adventure in Mexico when my dad flew in to Mexico City to join us for some epic hikes, including Nevado de Toluca. We met up at the bus station in Toluca and spent one night in an Airbnb in the city, which had one bed between the three of us. We stayed up that evening organizing backpacks and rehashing plans, which were still a bit cloudy. We weren’t entirely sure that the campground we wanted to get to actually existed as our information was pieced together by word of mouth and several different sources, some of which were regurgitated through google translate because our Spanish is beginner at best. Regardless, we got up early the next day to make the journey to Nevado de Toluca.
We were pleased to find that the public transportation options to the trailhead were simple and effective, and the first leg of our journey was a breeze. At the entrance to Parque de Los Venados, Pedro the stray dog decided to adopt us and accompany us on our hike. The hike to the campground was simple and enjoyable, and we all felt quite at home in the pine forests. We set up camp in the afternoon and hung about, enjoying the views and each other’s company. We decided to update the weather forecast on our Garmin, and saw that it was now calling for an hour of rain and possible thunder around 5pm. Certainly not ideal, but it was late in the day already and we thought we would just ride it out for an hour before dinner and let it pass. 5pm rolled around and a bit of light rain came before the skies cleared back to blue. Thinking that was the end of it, we made dinner and settled down for the night, and Pedro made himself a bed of dry grass beside our tents.
Little did we know that the rain was only a small taste of what was to come. After it got dark we could hear some thunder roaring in the distance, while some rain battered our tent. I thought of Pedro, sure he had made his way back down the mountain by now. I peaked outside, only to see him curled up in the grass and exposed to the elements. I felt terrible and despite the threat of fleas we tried to coax him into the tent vestibule. He wouldnt come, and we had to leave him to his own devices.
The thunder got closer and closer until it was right above us, accompanied by lightning illuminating the sky. Then came the snow, slowly at first but accelerating by the minute. There was nothing we could do about the whole situation except lie there and think about how we were sleeping under metal poles in an exposed area. We kept getting up in the night to push the snow off our tent and prevent a collapse. The storm evidently got socked in the valley right around us, and continued on for about four or five hours straight. Needless to say, we did not sleep well that night.
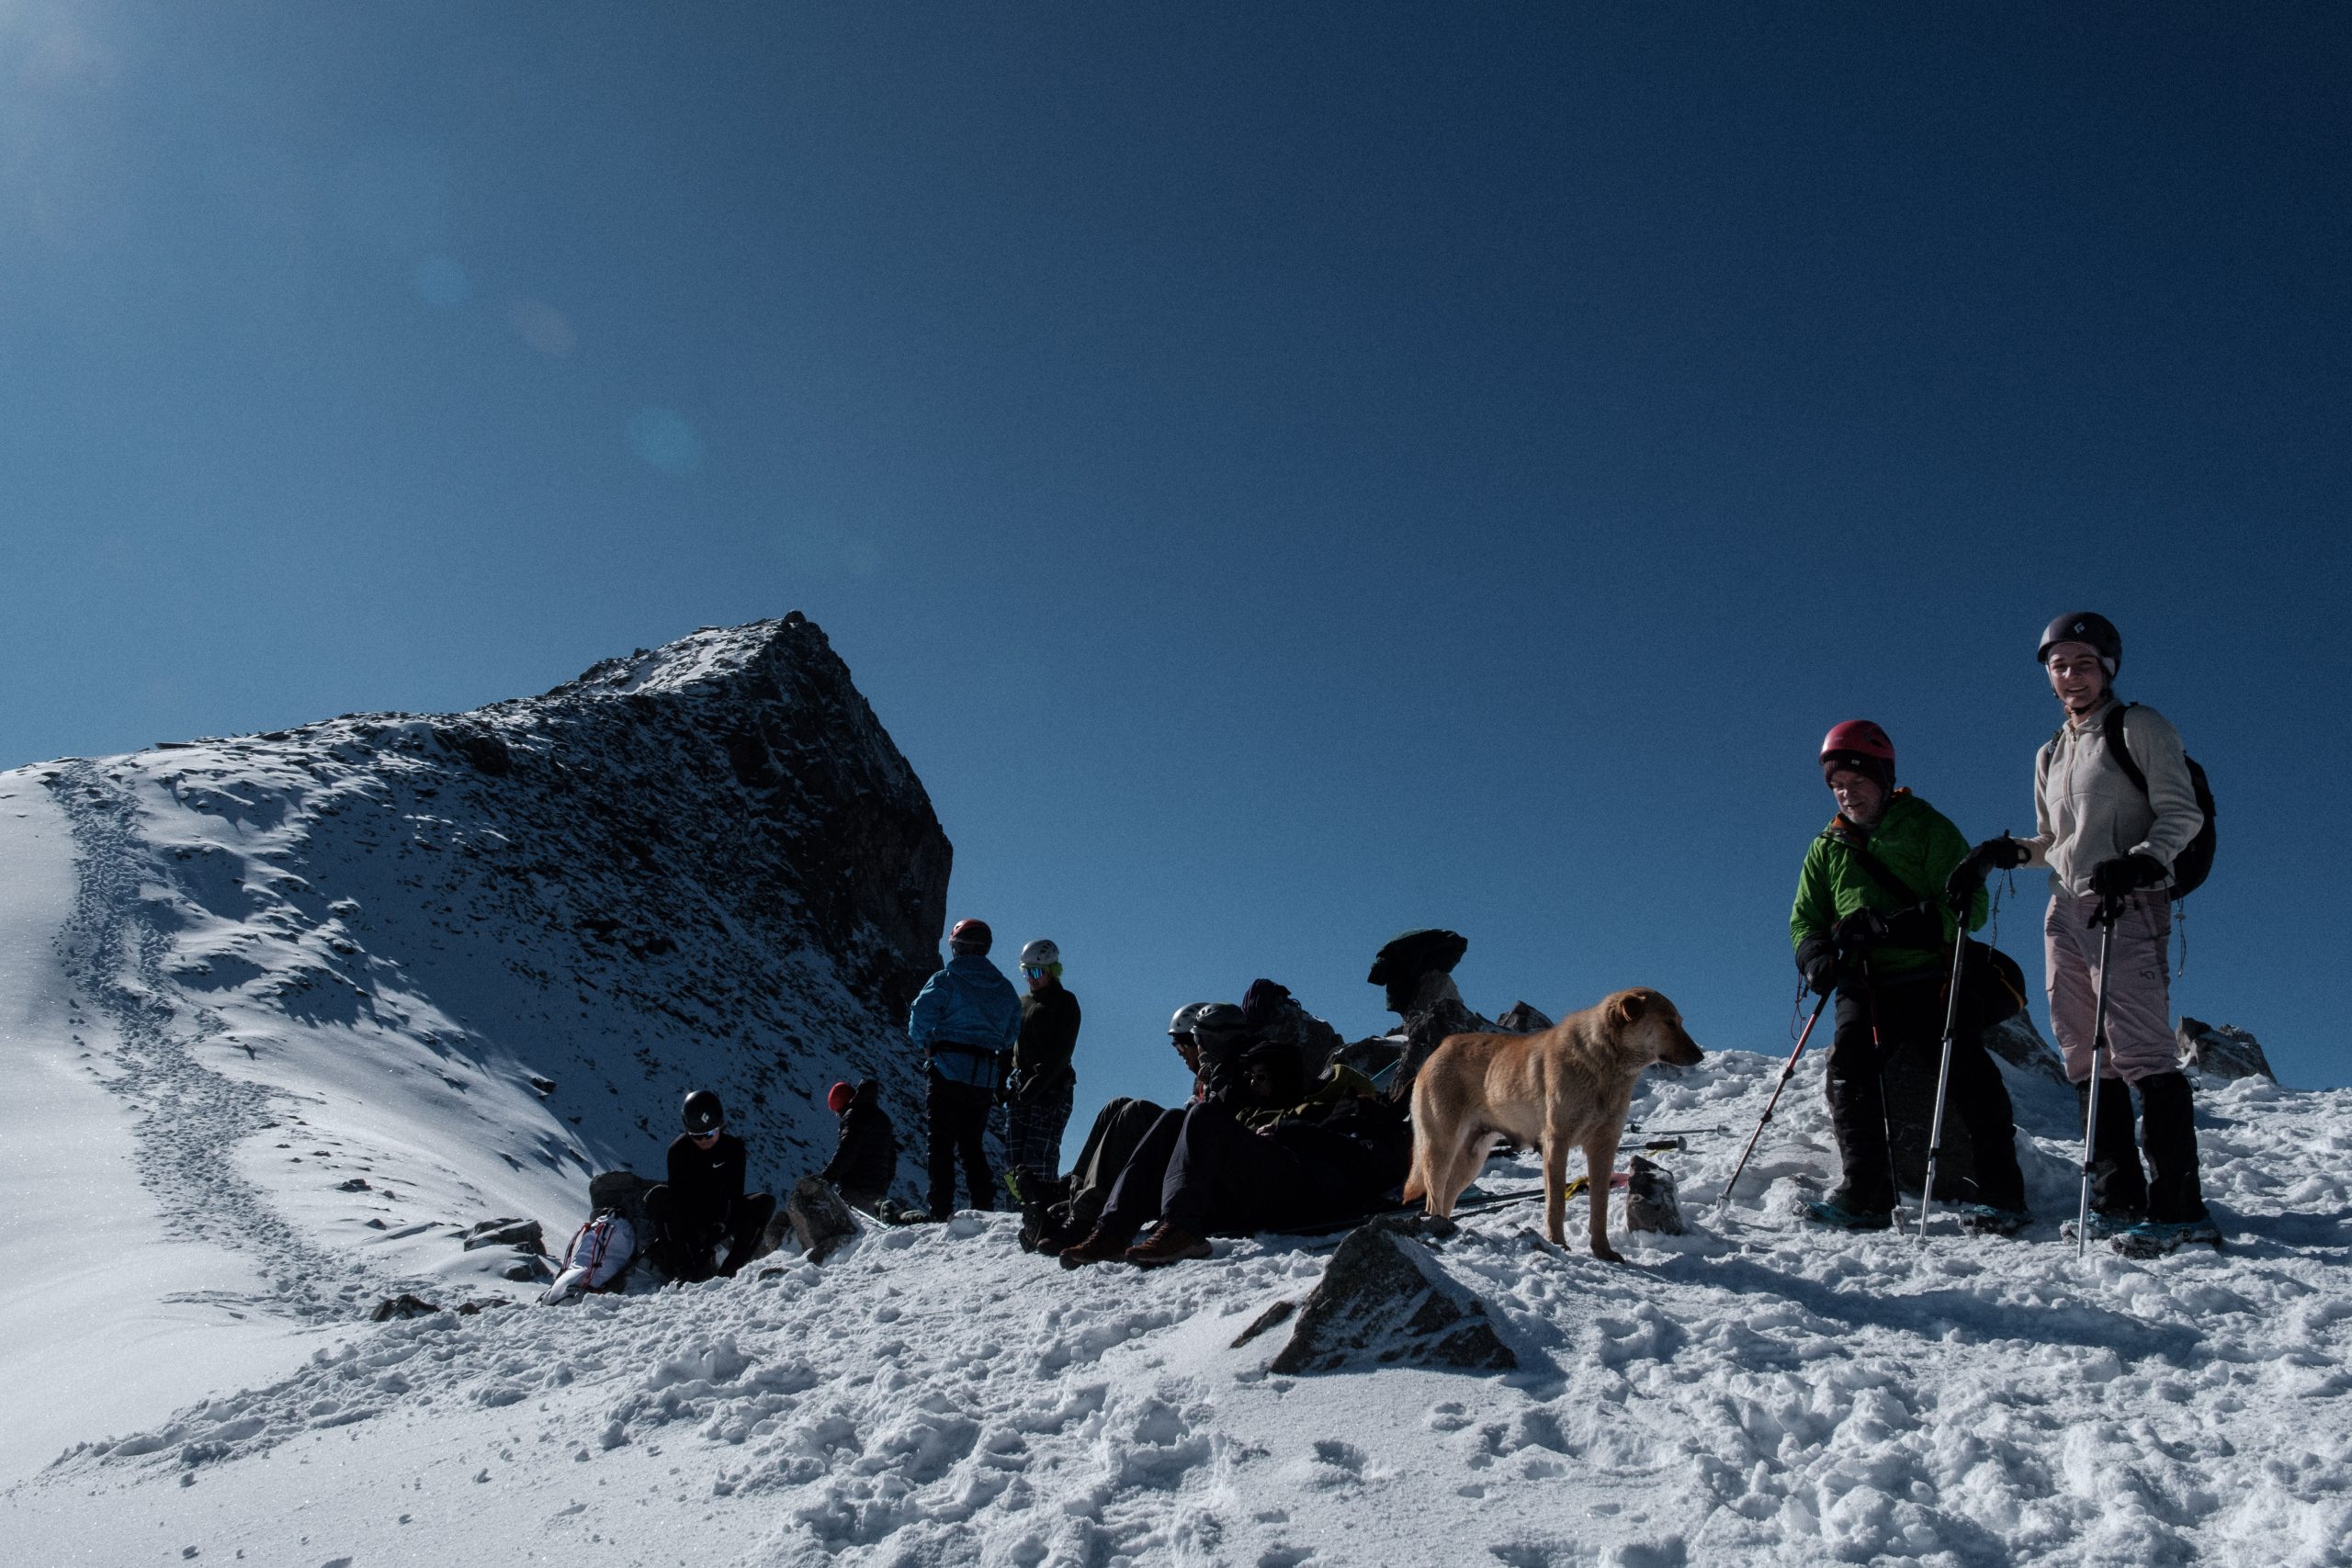
We woke in the morning, sure that our summit attempt was shot due to all the snow. Then, we heard voices. We opened the tent to see other hikers across the gully already on their way up, and we noticed that a lot of the snow had melted off throughout the night. I looked around for Pedro and he was nowhere to be found. We quickly got geared up and ready to summit.
We made our way up the mountain the next morning, shaking off our nerves from the unsettling experience the night before. As we ascended the now snowy ridge on our way to the summit, we saw something sticking its head up from behind the rocky outcrop above. Difficult to see at first, as we got closer we realized what it was. Illuminated by the morning sun, Pedro was cheering us on from just below the summit! What a good boy. He is clearly an experienced mountain dog, and probably knew of just the place to go in the event of such a storm as the night before.
In our many years of hiking this is the first time we have been caught in a storm at night above the treeline, and it’s certainly not an experience I would like to repeat. Perhaps we should have packed up and headed down at the first possibility of a storm while we still some daylight left, but hindsight is 20/20 as they say. The upside is that we were very well prepared to spend a night in the snow, and one thing we didn’t have to worry about was being cold. Still, the mountain humbled us and quickly reminded us of its power that night. All of this being said, don’t let this tale deter you from venturing out and camping on Nevado de Toluca yourself, just come prepared! Storm or no storm, it is sure to be an unforgettable experience.
Recent Posts